The Battle of the Archmages
Now, on this thread we spend so much time focussing on the glories of the prince that we can find ourselves ignoring, or down-playing, the significance of Archmage Lecalion. This would of course be a big mistake. You'll notice that, in the only game where I lost the archmage, fortune deserted me: the enemy magic phase (a good one at that), became overwhelming and my own units had to live without any buffs. Bad.
When I'm fighting against an army which relies on its magic phase to power through, then, I'm never under any illusion that getting rid of the lead enemy caster isn't a priority. Against some armies, rushing straight into the enemy caster is a bad plan: they might be in the midst of a huge steadfast anvil, designed to hold you in place and see you flanked (think Temple Guard, Grave Guard hordes and so on). However, some armies have very powerful but more vulnerable casters. I got to have a go at cracking one recently, the day before I moved to London. I was playing against another army of High Elves and, although my opponent (my sister's fiance, in fact!) wasn't an experienced 8th Ed player, he had a typically dangerous set of ranged force-projection units and items, including:
Level 4 Archmage, Folariath's Robe, Jewel of the Dusk, High Magic (with;
Arrow Curse, Fury of Khaine, Flames of the Phoenix, Vaul's Unmaking);
Banner of Sorcery;
20 Seaguard;
14 Archers;
2 Repeater Bolt Throwers.
Backing this up were 3 units of elite infantry and a White Sword prince, plus the usual sundries (2 eagles, tiranoc chariot) and a unit of 10 silver helms (a useful weapon for the shooting war: fast, armoured and in numbers enough to make them very hard for my shooting to destroy). Not a perfect list, then (no BSB!), but carrying a very nasty magic phase (D3+1 extra dice per phase!), and some decent shooting. To win, I wanted to kill his magic phase quickly and, to do this, I had to kill the enemy archmage standing in the centre.
 When you move, the first thing that goes is the terrain. Welcome, cereal box hill. Welcome.
Cutting the Head off the Snake
When you move, the first thing that goes is the terrain. Welcome, cereal box hill. Welcome.
Cutting the Head off the Snake
The principle is simple:
where assassination is possible, focus as much force against the enemy archmage and kill him before he can turn the game for the other side. For me, this means forming all my knights and the chariot into a fist and storming them into the soft underbelly of the enemy army with spells and arrows flying over their heads against the same part of the enemy line.
The above is easy where you're playing against an opponent with far fewer drops than you: you can simply deploy your attacking units opposite the enemy weak spot and rush it accordingly (as I did in my last game against Empire-
here). In this latest game, however, I was playing against a High Elf army with as many drops as me. How could I persuade my opponent to leave his archmage defenceless?
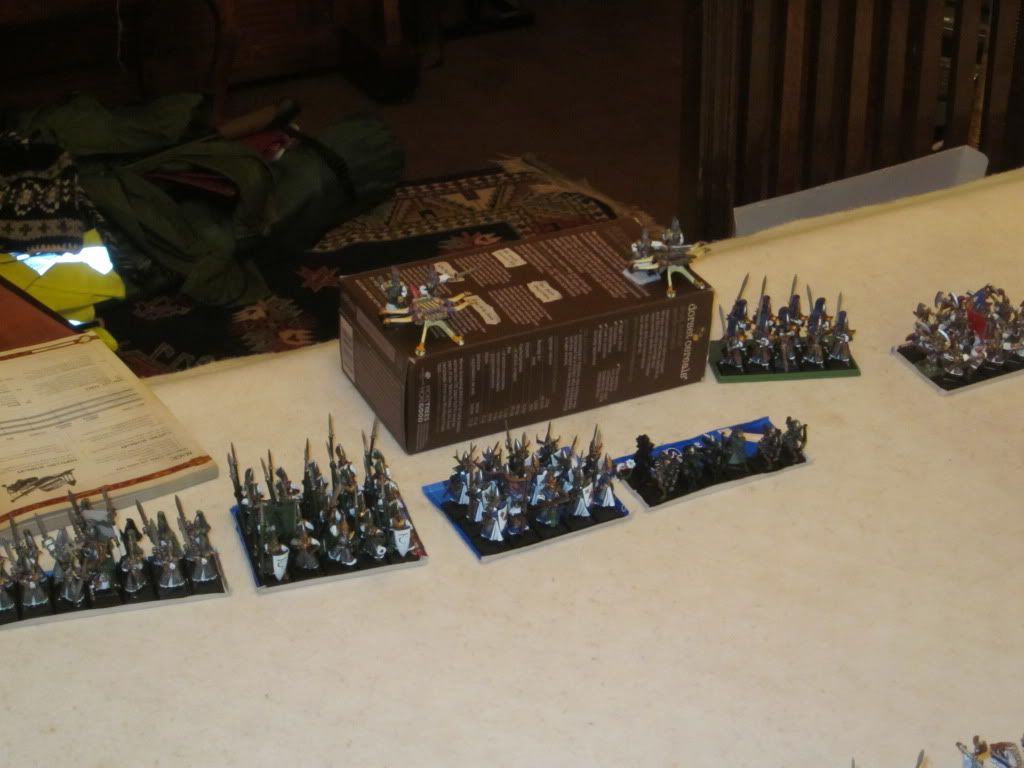
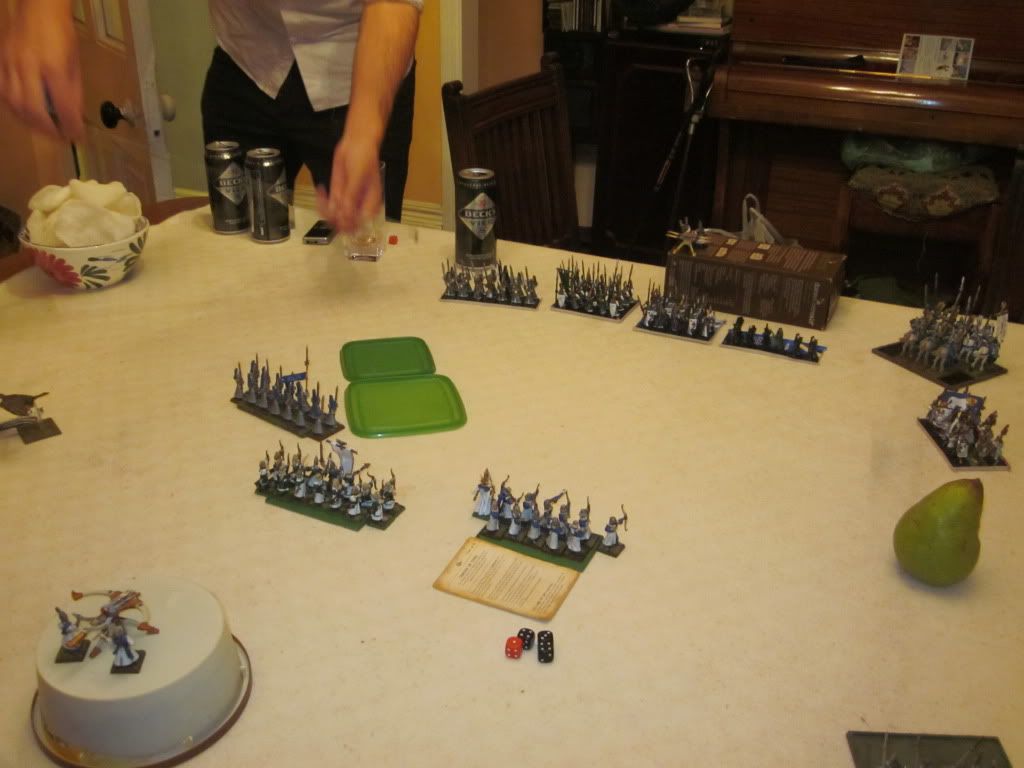
Deployment
Since my opponent made me drop first, I'm not able to just ambush him with my helms in the deployment phase. Instead, I deploy my fast units on the flanks in a pretty typical fashion. My opponent responds by placing his hardest infantry units opposite these to block what looks like an attempt by me to envelop his army's flanks. Indeed, he deploys his silver helms and chariot to do the same to me.
Notice the way my own infantry are deployed, however. By placing them near the back of the field, I open up all that space infront for my fast units to redeploy to where I really want them to go... I am trying to think of a better title but, for the moment, we shall call this tactic
Operation Bumrush. The details will change depending on the enemy army, but in principle, the steps are as follows.
1. First, redeploy your fast units and rush up the centre toward the weak enemy core and its precious archmage. Advance with all of your fast troops and keep the eagles close for support (even if you think you'll break your enemy in one turn, plan against enemy counter-charges!). Present too few targets and your enemy's job becomes easier.
2. Once you've marched your cavalry, prevent your enemy from surrounding you by setting up protective perimeters with your combat infantry. On the right flank, the spears and white lions form a defensive line to protect my centre from the enemy cavalry. On the left, my swordmasters advance just enough so that, if my opponent's swordmasters attempt to march toward the centre to counter my cavalry-attack, he'll be hit with a flank charge. Effectively, this unit is pinned in this sector of the field and the enemy centre is left defenceless.
3. Remember your Life archmage! The above manoeuvre isn't just about your knights: it doubles the tools you have slay the enemy caster early in the battle. Dwellers Below is even more of an immediate threat to your opponent's mage bunker than your knights are. Indeed, against larger bunkers, you will want to focus as much early effort against this unit as you can (with your shooting too, if necessary). Like all force concentration, this makes casting, dispelling and shooting choices difficult for your opponent. He can't stop all of your knights, shooting and magic in 2 turns! Of course, if you don't roll Dwellers, remember that you have this manoeuvre as a more reliable back-up!
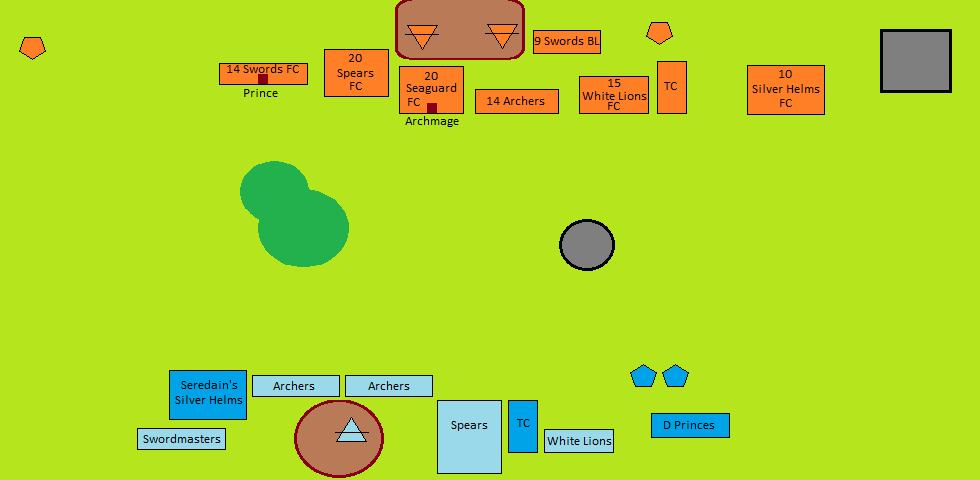
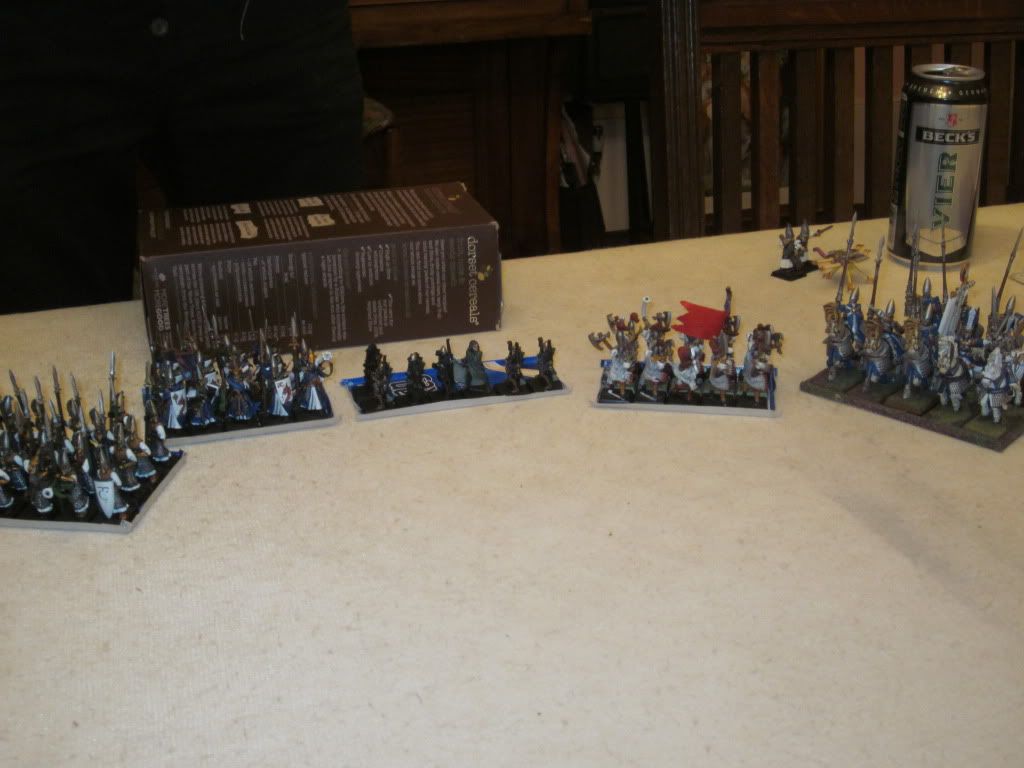
The Battle
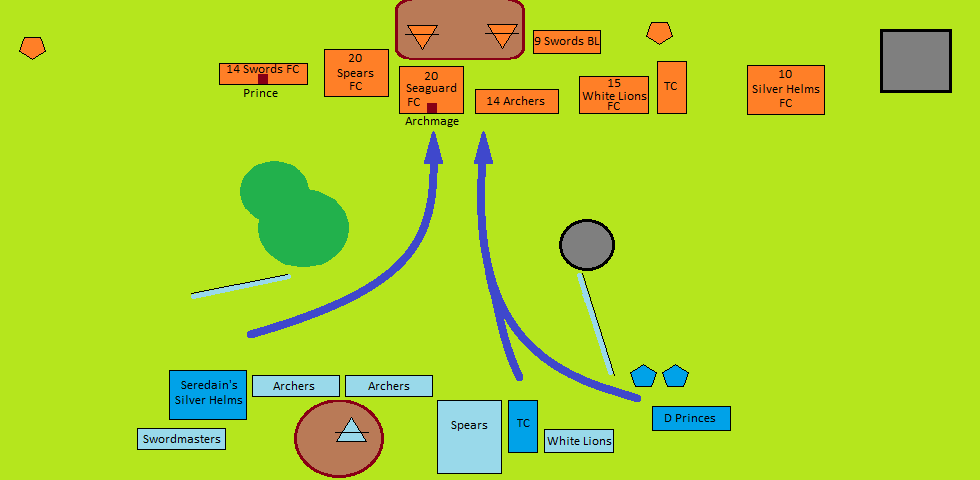
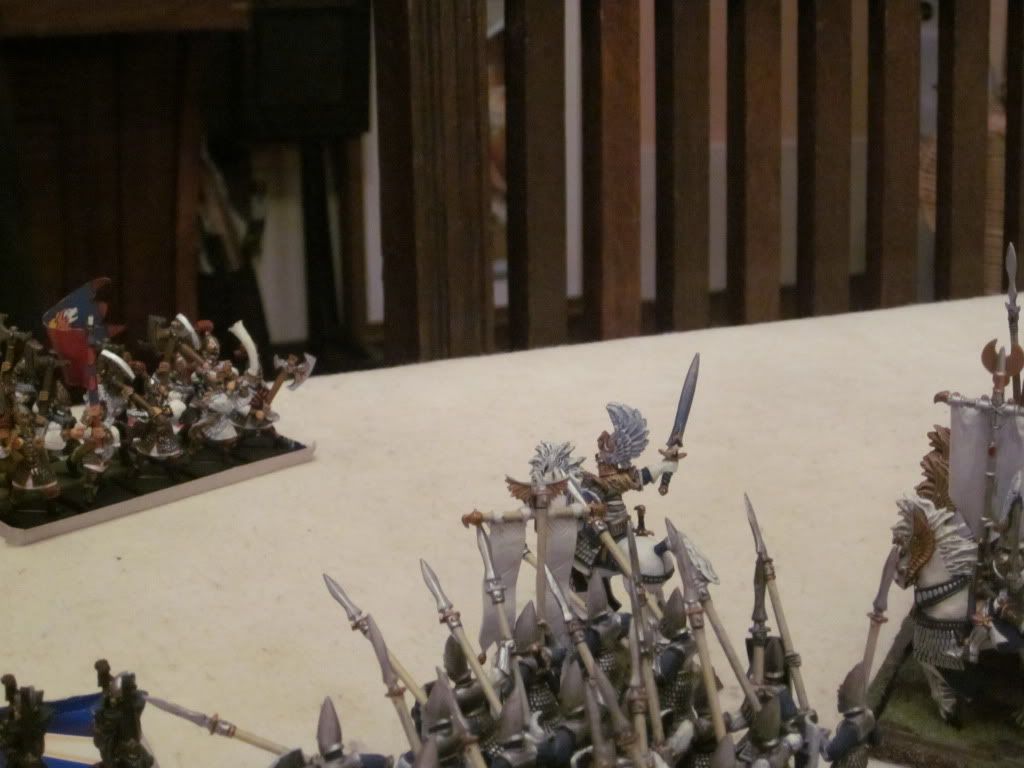
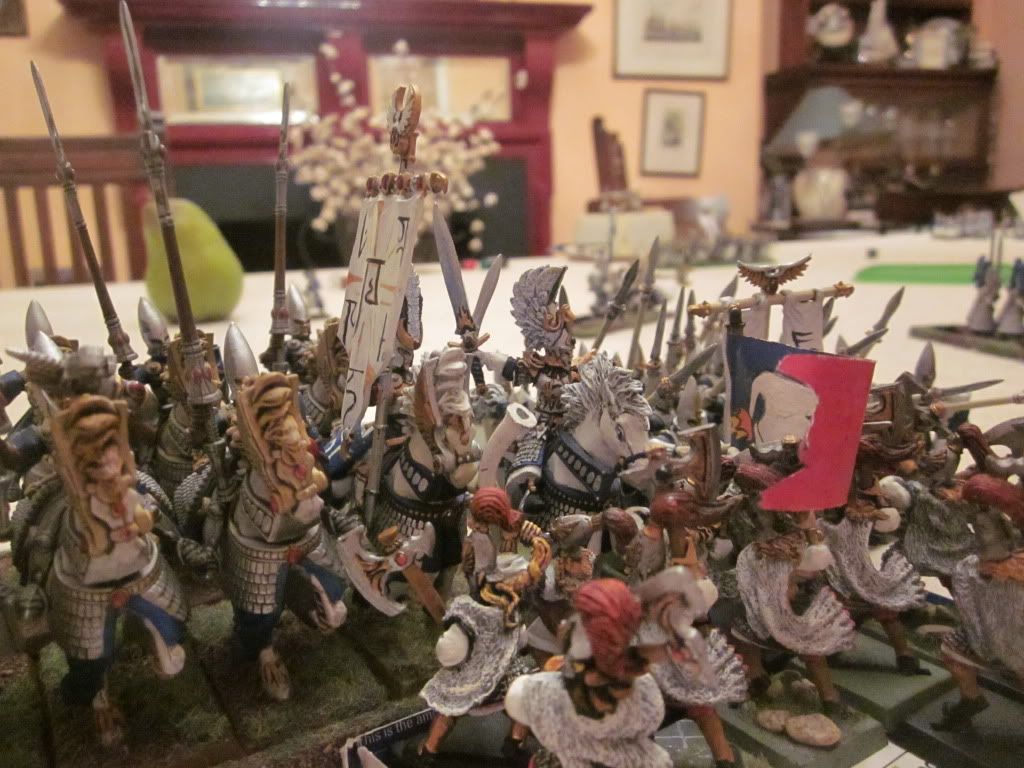
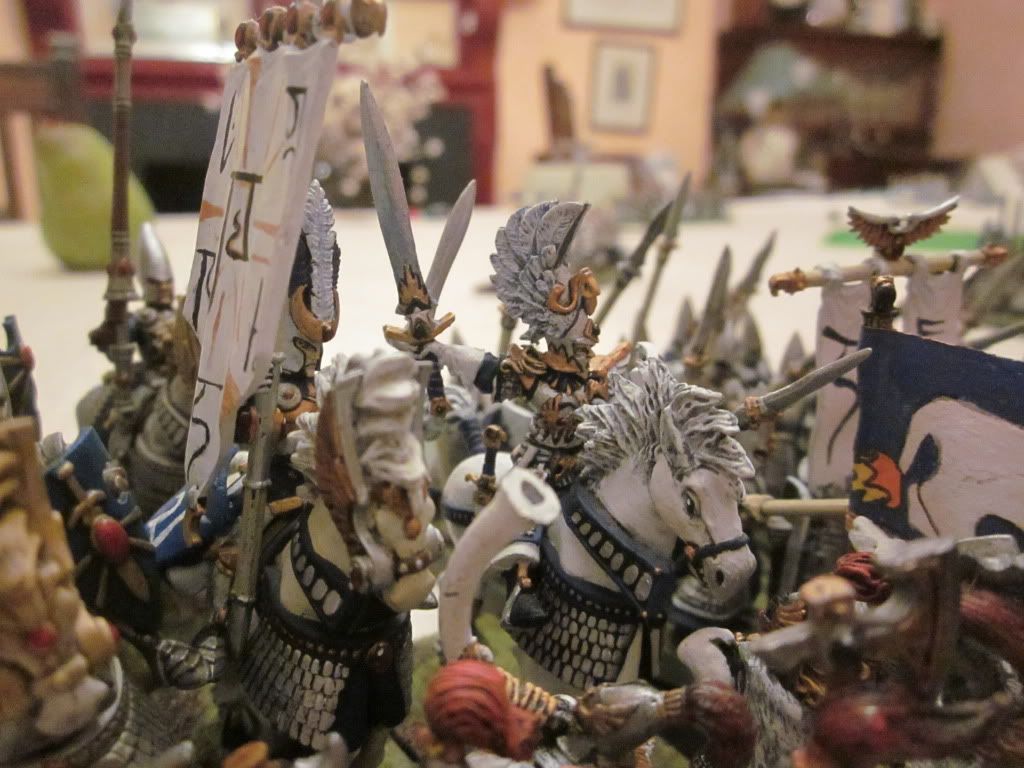
 End of Turn 2
My knights are within strike range of my enemy's vulnerable centre, but his own attacking avenues, on the flanks, have been blocked off. Note that, on the right, my white lion detachment is protected from a combined chariot/knight charge by placing it so as to keep the chariot in its flank arc (covered by the spears). The rogue bolt thrower model represents an enemy eagle (he ran down the dragon princes after they'd been shot/magicked up)!
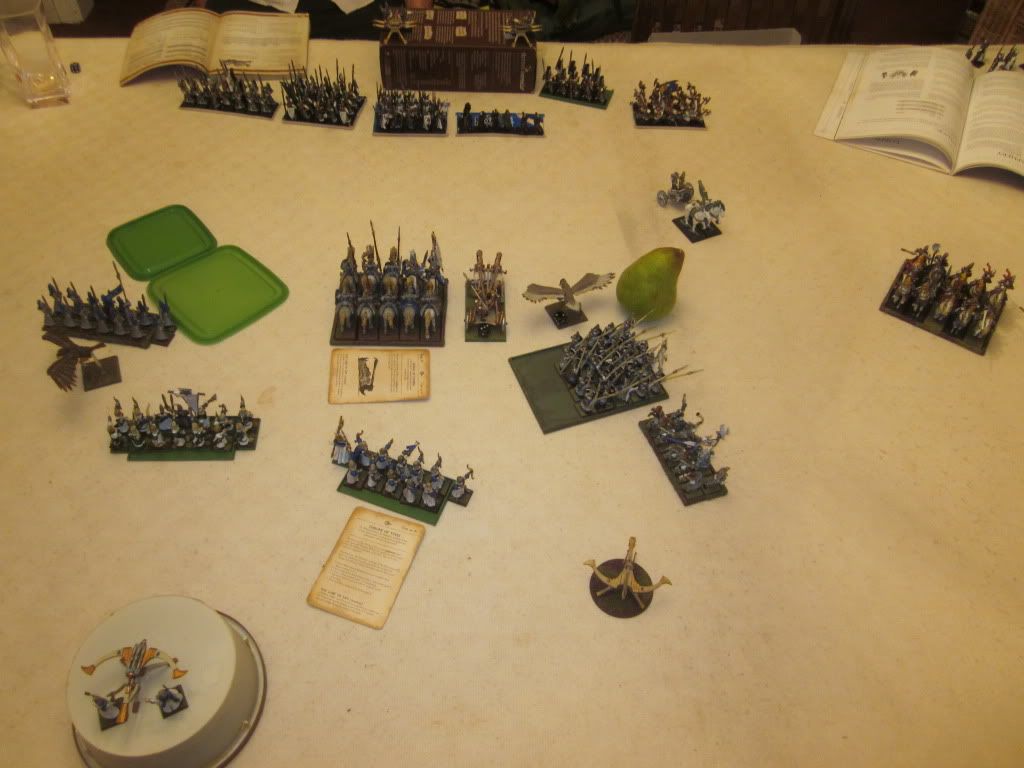
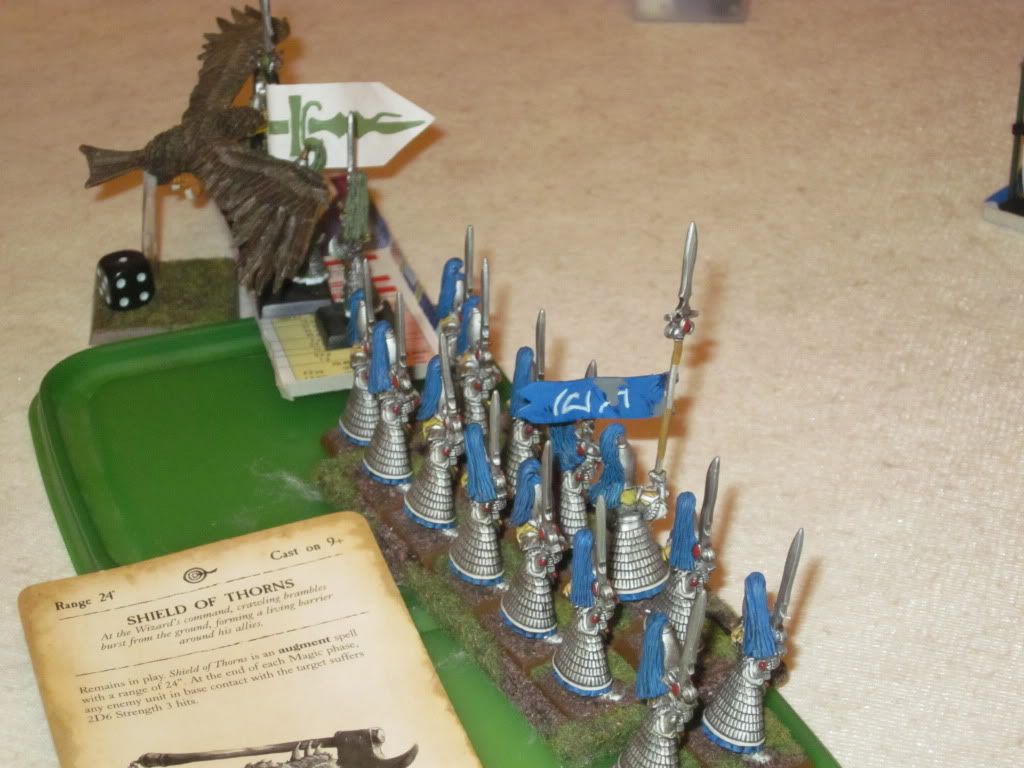
The enemy archmage is killed by Dwellers Below (this is why the Banner of the World Dragon is good!). Robbed of their prize, my knights now pick on the little swordmasters and run them down. My archers have taken out a repeater. On the right, the spears and white lions have, together, crushed my opponent's cavalry and run them down (the lions held and the spears came in with a flank charge once they'd dispatched the chariot- which had tried to pin them).
On the right, the enemy white lions just can't catch the manoeuvreable silver helms. Seredain (the turn after this shot was taken), takes a flank charge into them (his unit at the time was in the front arc, but individually he was in the flank: tricky

), breaks them but can't run them down. In the end I dance my knights around until I get a combo-charge alongside my spears. The enemy lions rally and latterly find themselves arrayed against overwhelming odds:
On the left and centre; once my shooting has taken out the last enemy repeater, they and my own repeater (which fired a salvo against the last enemy eagle to save itself), get to work on the enemy prince's swordmasters. Dwellers Below makes a bad situation worse. By the time the enemy swords get into contention (only to find themselves blocked by one of my eagles), they have been badly reduced. By the time the enemy prince himself sees a meaningful combat, he no longer has a unit around him and is overwhelmed.
The endgame- the enemy white lions are ground down and finished off.
Conclusion
'Win the support war' is (and certainly should be) a common mantra for us High Elves. If you can gain dominance in the movement and shooting phases by taking out the enemy support units early in the game (scouts, archers, cavalry etc), you can use this dominance to, firstly, protect your vulnerable infantry from damage & harassment and, secondly, to swing the big infantry fights your way.
Winning the battle of the magic phases is just as important, however. If your units are preserved from enemy spells, and your own archmage can cast unchallenged, the game is yours to win. If you think you can achieve this by killing the enemy mage as quickly as possible, go for it! If you have a strong fast attack force, you'll find that its speed, combined with your ranged magic and shooting, can put some enemy casters in a critical position very early in the game (your opponent can't dispel Dwellers
and the knightly Life buffs in the same turn). If you don't roll Dwellers, or if your opponent is savvy and keeps his caster out of range, having the ability to quickly rush him anyway (remembering the value of the Amulet of Light against other High Elves), can be very powerful.
Tp pull it off against armies you can't simply out-deploy, then, get your opponent to deploy his strength wide in order to protect his flanks. Then, on Turn 1, quickly redeploy your cavalry and use your knights, magic and shooting to overwhelm the enemy centre. Cut off the head!
 Get in there!
