Nice to see yet another battle report of yours! I think it is in Skaven nature to cheat so your opponent simply played to his army strength
The Cavalry Prince - List Design, Tactics, Battle Reports
Moderators: The Heralds, The Loremasters
-
Swordmaster of Hoeth

- Southern Sentinel
- Posts: 4480
- Joined: Thu Jul 01, 2004 9:01 am
- Location: On the path of an outcast
Re: The Cavalry Prince - List Design, Tactics, Battle Reports
Hi Seredain!
Nice to see yet another battle report of yours! I think it is in Skaven nature to cheat so your opponent simply played to his army strength I don't think he didn't play clever, he definitely used the opportunity to soften you up before the combat. I don't know what units he had available but his shooting was really dangerous. Maybe putting his units in horde formation was not that good and possibly he could wait with his main infantry before he softens you up more. But then Skaven tend to be impatient too I also think that his greed was his undoing. He had a chance to invest more in special and rare while going overboard with it. I am glad you could stay focused on the game and won despite some heavy blows early in the game. It can be difficult to stay on track against such opponents. Congratulations!
Nice to see yet another battle report of yours! I think it is in Skaven nature to cheat so your opponent simply played to his army strength
Twitter @SwordOfHoeth
High Elves MSU - Observations
Rabidnid wrote:Are you seriously asking someone called Swordmaster of Hoeth why he has more swordmasters than white lions? Really?
-
SpellArcher
- Green Istari
- Posts: 13847
- Joined: Sat Sep 13, 2008 11:26 am
- Location: Otherworld
Re: The Cavalry Prince - List Design, Tactics, Battle Reports
Yep, good stuff old son!
Your opponent seemed to be giving up too many advantages of Skaven to me. He maxed out on some dangerous things (Gutter Runners, WLC) but was still too exposed. I loved his assessment of Skaven magic! Obviously not keen on having a way of removing a 3+ Ward Chosen block in one phase.
Even from a HE point of view, hero-level characters do not make up for the combat shortcomings of Core infantry I think. His Hordes just couldn't cope at all with your elites. I know from personal experience how painful Gutter Runners can be but they didn't take out anything critical here. I think it must be quite intimidating for an opponent to have all five of your life-buffed combat units heading straight for his lines.
Between managing to stand up, fending off his bent plays and winning convincingly an heroic effort I feel!
A New Blog (Orcs and Goblins)
http://ulthuan.net/forum/viewtopic.php?f=5&t=70550
Cavalry Prince Reloaded
http://ulthuan.net/forum/viewtopic.php?f=80&t=70001
http://ulthuan.net/forum/viewtopic.php?f=5&t=70550
Cavalry Prince Reloaded
http://ulthuan.net/forum/viewtopic.php?f=80&t=70001

Re: The Cavalry Prince - List Design, Tactics, Battle Reports
Cheers chaps!
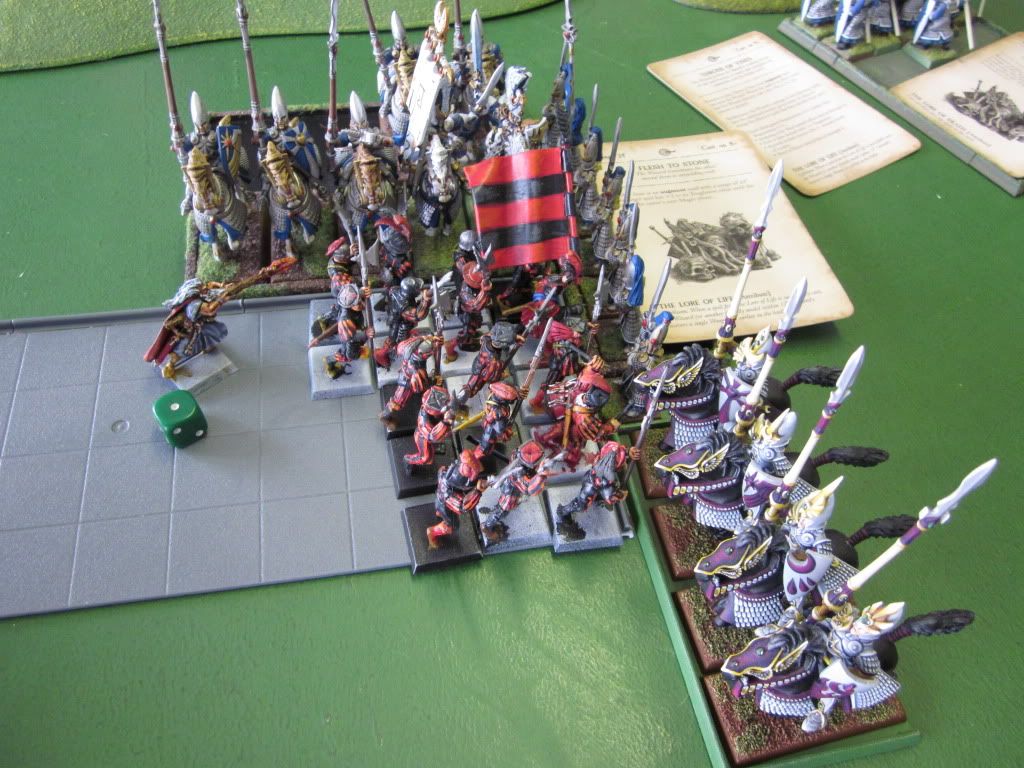
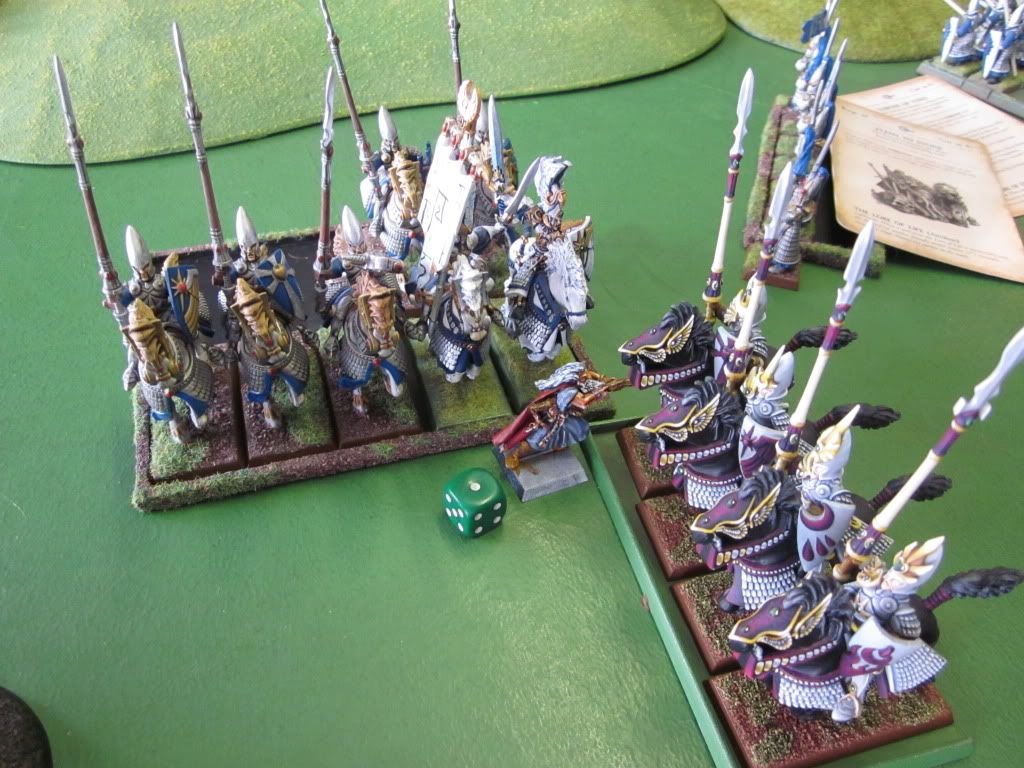
Heroic effort is right, SA! I was literally close to passing out by the end of it (my prince falling off his horse was probably a metaphor). But there was no way in hell I was going to lose another game by forfeit. No way! Tactically speaking, apart from rolling well with his shooting, my opponent didn't really force me to make any difficult choices. I had the heart of his army right in front of me after deployment and he didn't really have anything to stop me carving it up. The total lack of magic was fatal and something he really needs to rectify (you only need to spend the minimum on a caster and you get access to 2d6 power dice like anyone else). What with all the pills and malnutrition, though, I didn't really mind any of this.
As you guys suggest, if my opponent really wanted his infantry to stick around, he should've been looking at deeper formations. On the other hand, such formations would've been easier to outflank for my swordmasters and white lions unless he was careful with his line-of-battle setup, which he wasn't, or unless he had hammer units ready to counterstrike, which he didn't. As for all those slings, they were scary for my support units but ultimately couldn't stop my advance since, with flesh to stone on hand, all 3 of my elite combat units could shrug off the missiles. In the end, the gutter runners were forced to just keep out of the way (though I had no choice but to hack my way through the wood) and take out what they could. They did this pretty well, but all the work they were doing wasn't able to help where it really mattered since my knights, swords and lions all made it into their big combats unscathed (albeit sans prince).
The standard at my local club (I'm pretty new there) is mixed, but the top players seem to be pretty good. I lost my last game by default because I missed it, so the Skaven player I was drawn against was determined with that in mind. At the top of the campaign tree, though, are three players (Dwarfs, Vampires and Daemons) who are meant to be strong- they've won all their games so far, the latter two with massacres in every game they've played. I was hoping to draw the Vampire player for this round (someone's got to stop him, right?), but I got Warriors of Chaos instead because someone else called him out. Not sure what the Warriors guy is like, but I guess we'll find out, eh?
Cavalry Princes, Shadow Magic and Life Magic
Olannon,
Good work on keeping up the cavalry prince love!
Your experimentation with Shadow over Life is very understandable. It's worth noting that, despite the Prince himself and the big block of helms, you and I actually run quite different lists. Your big dragon prince unit really changes the way the army works (as do other smaller elements like the reduced bolt thrower count). The short points are that your list is both inherently more aggressive and more heavily armoured, since you have more knights and fewer elites. The improved grinding capacity and unit protection provided by Lore of Life is perhaps not, therefore, as important. Rather the increased damage-dealing capacity provided by shadow (Withering, Mindrazor) suits your knights rather well whereas my elites are happy to grind away as long as I can keep them at a decent strength. The loss of Dwellers is a shame but you can't have everything and knights stand up well to the kind of troops that Dwellers is usually best used against (though you won't want to be using them to grind when you can help it). A problem does lie in the absence of miscast protection, meaning your magic phase will typically be more eggs-and-baskets with Shadow than with Life (especially with the extra cost of the Banner of Sorcery thrown in). The effect of miscasts makes the archmage himself more vulnerable too, a problem compounded by the loss of life bloom. A protective item of some kind has more merit, therefore, on the Shadow mage than the Life mage and is worth serious consideration.
In summary, I'd say that your list has better synergy with Shadow magic than mine and with the change, therefore, gains you a serious amount of aggressive oomph with Mindrazor, Withering and Miasma without making your army overly vulnerable to damage due to the prevalence of heavy armour. Your more expensive magic phase (BoS) also allows you to overcome the high casting values of Shadow better than mine, leaving only its brittle nature (higher casting values increase likelihood of miscasts, no miscast protection, no character healing), as the potential problem you'll have to bear in mind- especially since you have only one caster. My list, by contrast, benefits well from Life with its small elite units (Stone, Regrowth, Dwellers) and gains some further benefit by virtue of my magic phase being both cheap (no protective items needed, no Banner of Sorcery) and safer (Throne, Life Bloom, lower casting values). I think you could go with Shadow and I could go with Life and, considering the differences in our lists, neither would be the wrong choice.
Last edited by Seredain on Tue Sep 20, 2011 9:59 pm, edited 1 time in total.
The Cavalry Prince - List Design, Tactics, Battle Reports
http://www.ulthuan.net/forum/viewtopic.php?f=76&t=33584
http://www.ulthuan.net/forum/viewtopic.php?f=76&t=33584

Re: The Cavalry Prince - List Design, Tactics, Battle Reports
Seredain, I just wanted to say that I've been quite inspired by this thread of yours, and your approach. Along with Curu's thread I was all ready to field a cavalry list after reading here. I've always been a big fan of the element of maneuver.
Like I said in my own new blog-thread I'm going for a different approach (at least until I finish painting the Silver Helms), but if (or more likely when) my current hero-hammer approach turns out to be (too) suboptimal I expect I'll go in a more orthodox cavalrist direction.
Anyhow, I just wanted to say I've been enjoying your reports and general analysis.
Re: The Cavalry Prince - List Design, Tactics, Battle Reports
Cheers Modessa. I think you should give the eagle noble a try and see how it works for you. I can imagine an archmage-led list with BSB helm hammer and noble eagle-rider (death mage knights are popular) posing some pretty nice possibilities.Modessa wrote:Seredain, I just wanted to say that I've been quite inspired by this thread of yours, and your approach. Along with Curu's thread I was all ready to field a cavalry list after reading here. I've always been a big fan of the element of maneuver.
Like I said in my own new blog-thread I'm going for a different approach (at least until I finish painting the Silver Helms), but if (or more likely when) my current hero-hammer approach turns out to be (too) suboptimal I expect I'll go in a more orthodox cavalrist direction.
Joey I'm not big on Wood Elves I'm afraid. It's good to try new things, though (8th is full of surprises), so I'll look in on your thread for sure and see how orthodox your fellow Asrai turn out to be!joey_boy wrote:Great thread, Iv read most of it and I'm happy to have done so! Anything that is trying to play the game differently and succeeding is ace in my book! I'd love to play against this type of list with my WE. I'm hoping to have time to make a proper rundown and evaluation thread of my own after I'm done with school next week and I'd love to get your comments on it Seredain! If your interested it can be found here: http://www.asrai.org/viewtopic.php?f=13&t=20461
A new thread with a deeper analysis where I'll list my reasoning behind the units I'm running, there eq setup, synergies and roles will be up after next week.
/Johan R
Hi Vagrant,TheIdleVagrant wrote: I have been playing around in Army Builder to see what I could do with the list based on what models I have currently and how I would go about planning to build this army. I have had to make a few changes based on the models I have at present and came up with this slightly contentious version of the list:
...
So at a glance the main changes were the removal of the Spearmen and the addition of the Lothern Sea Guard. I have done this purely because of the models (I own the island of blood set). What I am interested in knowing, is whether the unit of lothern Sea Guard will be able to function strategically, in a similar fashion to the Spearmen in the original list (with the added bonus of a possible extra bit of shooting).
My limited experience tells me that it should be ok, and would eventually even itself out with a few tactical tweaks (playing to the strength of the unit etc) - how would one change the existing tactics to match a sea guard set-up? I know there are 10 less models in the unit - would the rank bonus be sufficient if more survive the inevitable hail of missile and magic fire that would come there way?
I would love to hear your thoughts on this, and apologise if this newbie is trying the patience of the more seasoned members of the forum.
The Idle Vagrant.
Thanks for the comments - no trouble at all.
Seaguard (2)
Your seaguard aren't a terrible choice- they give you a very powerful shooting phase alongside the archers and repeaters over and above the spear column I run. What you'll have to bear in mind is that the absence of those extra ranks will reduce your ability to break the largest steadfast units alongside your elites. The extra shooting you've chosen can take up some of the slack, however, by aiming those arrows at the enemy blocks targeted by your attacking units.
The seaguard's tendency to sit back and shoot (or lose the benefit of points spent on bows) will also mean you'll have to be careful, when taking your knights and elites forward, not to allow the enemy to outflank your main attack. This will likely reduce the frontage you can tackle aggressively at any given time, but the white lions would make a good anchor in this context and should allow your other combat units to focus their energy on a narrower part of the enemy army well enough.
I've covered a few of the issues (as I see them) surrounding our core choices on a couple of the pages earlier in the thread. They basically set out why I've chosen spears by pointing out the cons (while acknowledging the pros) of taking more defensive core (archers, seaguard) alongside the other units in this list. In summary, it limits your ability to be really aggressive. Archers and seaguard both have merit (Anathir runs an archer horde in his version of the list) and your block of 25 guard may bring your list something of a 'best of both' quality, but it's worth acknowledging the weaknesses of your choices so that you can best plan against them. In my list, the relative lack of shooting when compared with your list might, for example, force me to come forward more against shooty opponents I can't handle with counter-battery fire. Anyway, the paragraphs to look out for are:
'On Seaguard, Archers and Spears' (page 6); and
'The Spearelf Column vs the Archer Horde' (page 14).
I hope they're useful. In any case, play with the seaguard block for a bit (25 is a good number for them), and record what you learn about them for posterity!
Last edited by Seredain on Tue Sep 20, 2011 10:00 pm, edited 2 times in total.
The Cavalry Prince - List Design, Tactics, Battle Reports
http://www.ulthuan.net/forum/viewtopic.php?f=76&t=33584
http://www.ulthuan.net/forum/viewtopic.php?f=76&t=33584
-
SpellArcher
- Green Istari
- Posts: 13847
- Joined: Sat Sep 13, 2008 11:26 am
- Location: Otherworld
Re: The Cavalry Prince - List Design, Tactics, Battle Reports
A Grey Seer is really, really dangerous and not that expensive. When you consider spells like Dreaded 13th, Plague, Scorch and Cracks Call it's hard to see why you wouldn't take one really. Warlock Engineers are also versatile and great value.Seredain wrote: The total lack of magic was fatal and something he really needs to rectify
Rarely do I see a Skaven block that isn't five-wide. 30 is popular but so is 40 or more. Of course they usually have weapons teams floating around too.Seredain wrote:he should've been looking at deeper formations.
An interesting take on High Elf magic. I think it's good to take an all-round view rather than saying "my army must have this or that spell". I started out thinking 'must take Seerstaff to get Curse and Flames every game'. More and more though I think it's a case of building a list and building the magic that plays to multiple strengths of that list. So my army might have decent shooting and if I roll Curse, great but Shield would also help protect my small units, Flames is just a great utility damage spell, Fury might help me counter Wraiths (if I lack magical attacks) and so on. What I'm trying to say is, pick the Lore that has the most matches with the strengths of your army, if you miss one you can compensate in other sectors.
What's in this Warriors army then?
A New Blog (Orcs and Goblins)
http://ulthuan.net/forum/viewtopic.php?f=5&t=70550
Cavalry Prince Reloaded
http://ulthuan.net/forum/viewtopic.php?f=80&t=70001
http://ulthuan.net/forum/viewtopic.php?f=5&t=70550
Cavalry Prince Reloaded
http://ulthuan.net/forum/viewtopic.php?f=80&t=70001
-
Curu Olannon

- Vindicated Strategist
- Posts: 4929
- Joined: Thu Sep 30, 2004 6:21 am
- Location: Oslo, Norway
Re: The Cavalry Prince - List Design, Tactics, Battle Reports
I agree with your assessment of Shadow vs Life Seredain, it's pretty much what we've been discussing recently. However, having playtested Shadow now, I'm not sure I'll be headed down that road just yet. There are several key problems which Shadow, alone, cannot address. This is why I'm considering the bsb Mage-knight approach if I want to continue with Shadow. I'll elaborate more on this matter tomorrow, after I've played against Wood Elves (again): at that time I'll make a choice of what Lore to continue with (for now, anyway).
As for Warriors of Chaos - I've fought them quite a few times recently. I suppose you will do fine with your normal tactics against them. If you want to know what to expect, check in on a couple of reports. In general though, beware of the following:
- Tzeentch casters. They have +1 extra to cast, usually sport a 3+ ward save and have a cheap and effective (though random) lore. Pandamonium and Treason are in particular nasty to face. Bear in mind that when Treasoned, you don't re-roll hits (ASF cancels ASF) so it's not THAT nasty. Gateway is dangerous, but overrated. It will hurt, but its devastating effect is like failing an ld10 test - it happens quite rarely.
- Infernal Puppet. Modifying miscast with D3 is just insane. Make sure to have Throne up when you do your big casts.
- Marauders: They hit harder than you'd think. Make sure to bring them down with combo-charges etc. Dwellers also works wonders here, as does Flesh to Stone.
Remember: you dominate movement and deployment. Pick your fights reasonably! As you have a bit more shooting than I do, I believe there's no need to rush a combat unless you know it's in your favour.
Best of luck
Retired from Warhammer. Playing Warmachine & Hordes (Cygnar).
Follow me on Courage of Caspia, my blog.
Warhammer blogs from 2011-2015:
:: Path to Glory - High Elves Army Blog ::
:: Curu Olannon's Vindicators - 2500 points Army Blog (Old book, outdated) ::
Follow me on Courage of Caspia, my blog.
Warhammer blogs from 2011-2015:
:: Path to Glory - High Elves Army Blog ::
:: Curu Olannon's Vindicators - 2500 points Army Blog (Old book, outdated) ::
-
TheIdleVagrant
- Posts: 4
- Joined: Thu May 26, 2011 6:54 pm
- Location: London UK
Re: The Cavalry Prince - List Design, Tactics, Battle Reports
Hi Seredain - thanks for the reply. I go back and read those paragraphs and see what I can do with the list and my currentSeredain wrote: Hi Vagrant,
Thanks for the comments - no trouble at all.
Seaguard (2)
Your seaguard aren't a terrible choice- they give you a very powerful shooting phase alongside the archers and repeaters over and above the spear column I run. What you'll have to bear in mind is that the absence of those extra ranks will reduce your ability to break the largest steadfast units alongside your elites. The extra shooting you've chosen can take up some of the slack, however, by aiming those arrows at the enemy blocks targeted by your attacking units.
The seaguard's tendency to sit back and shoot (or lose the benefit of points spent on bows) will also mean you'll have to be careful, when taking your knights and elites forward, not to allow the enemy to outflank your main attack. This will likely reduce the frontage you can tackle aggressively at any given time, but the white lions would make a good anchor in this context and should allow your other combat units to focus their energy on a narrower part of the enemy army well enough.
I've covered a few of the issues (as I see them) surrounding our core choices on a couple of the pages earlier in the thread. They basically set out why I've chosen spears by pointing out the cons (while acknowledging the pros) of taking more defensive core (archers, seaguard) alongside the other units in this list. In summary, it limits your ability to be really aggressive. Archers and seaguard both have merit (Anathir runs an archer horde in his version of the list) and your block of 25 guard may bring your list something of a 'best of both' quality, but it's worth acknowledging the weaknesses of your choices so that you can best plan against them. In my list, the relative lack of shooting when compared with your list might, for example, force me to come forward more against shooty opponents I can't handle with counter-battery fire. Anyway, the paragraphs to look out for are:
'On Seaguard, Archers and Spears' (page 6); and
'The Spearelf Column vs the Archer Horde' (page 14).
I hope they're useful. In any case, play with the seaguard block for a bit (25 is a good number for them), and record what you learn about them for posterity!
models.
Really apprdciate the time and energy you are putting into this thread!
At least I'm housebroken...
-
Curu Olannon
- Vindicated Strategist
- Posts: 4929
- Joined: Thu Sep 30, 2004 6:21 am
- Location: Oslo, Norway
Re: The Cavalry Prince - List Design, Tactics, Battle Reports
Since you have more experience against Daemons than I do, I'd appreciate some input - I've put up a thread in the tactics section  As we've discussed previously, our lists play differently but there are undeniably similarities. As such, I'd love to hear your thoughts on the matter.
Can I get the link for the battle report for the collection please?
Thanks,
~Olannon
Can I get the link for the battle report for the collection please?
Thanks,
~Olannon
Retired from Warhammer. Playing Warmachine & Hordes (Cygnar).
Follow me on Courage of Caspia, my blog.
Warhammer blogs from 2011-2015:
:: Path to Glory - High Elves Army Blog ::
:: Curu Olannon's Vindicators - 2500 points Army Blog (Old book, outdated) ::
Follow me on Courage of Caspia, my blog.
Warhammer blogs from 2011-2015:
:: Path to Glory - High Elves Army Blog ::
:: Curu Olannon's Vindicators - 2500 points Army Blog (Old book, outdated) ::
Re: The Cavalry Prince - List Design, Tactics, Battle Reports
No problem Vagrant!
Like I say, check out the page or two preceding my daemons battle report. There's stuff there from more experienced daemon hunters than me. Oh one last thing- if it's Tzeentch, point dragon princes at it - they'll shrug off the flaming attacks.
Good luck!
P.S. One final final thing: daemons have low toughness, so High ELf core is excellent against them. Keep your core units in play alongside your more elite forces - they can swing it for you if committed at the right time. My spear column saved my arse in that last game!
I think I'll be ok here. This guy has a non-fully painted army and someone used the event 'fool's gold' on him last turn, so he won't have been able to generate any gold in the build-up to this battle. If I spend all my available gold (220 for this round), I'll have a points advantage of 470. I really should clean him up, then! If I lose, mind, none of you will hear about it.Curu Olannon wrote:As for Warriors of Chaos - I've fought them quite a few times recently. I suppose you will do fine with your normal tactics against them. If you want to know what to expect, check in on a couple of reports. In general though, beware of the following:
No idea. All I've heard (rumour only), is that this guy doesn't have hell cannons. I'm expecting some typical combination of marauder horde, knights, warriors and hounds. The real surprise will lie with the character choices: if I see sorcerors on discs I'll expect the 3+ ward save and shoot something else.SpellArcher wrote:What's in this Warriors army then?
I'm afraid my experience consists of that one battle! In the page preceding the Daemons battle report there are a some decent contributions from the guys on how we take on daemons. It's the character loadouts that I was worried about so there's some good stuff on that (re. the bloodthirster in particular). Sub-bloodthirster Khornate characters are likely to be toting killing blow, so your prince will want to be toting Loec against them. Bloodletters all have killing blow, so resist throwing your knights into the front of them unless you have to. Slaaneshi characters will have siren song, forcing a failed charge. Since your max charge range is very long, they can force this early but often you'll find you won't get drawn out of position too badly (you'll only move d6 on the failed charge). Have some support troops ready to counter this. As for daemonettes around such characters, your cavalry will stomp them. Be sure, however, to get rid of the herald because it'll grant the unit ASF. In fact, in principle, always kill the herald.Curu Olannon wrote:Since you have more experience against Daemons than I do, I'd appreciate some input - I've put up a thread in the tactics section
Like I say, check out the page or two preceding my daemons battle report. There's stuff there from more experienced daemon hunters than me. Oh one last thing- if it's Tzeentch, point dragon princes at it - they'll shrug off the flaming attacks.
Good luck!
P.S. One final final thing: daemons have low toughness, so High ELf core is excellent against them. Keep your core units in play alongside your more elite forces - they can swing it for you if committed at the right time. My spear column saved my arse in that last game!
The Cavalry Prince - List Design, Tactics, Battle Reports
http://www.ulthuan.net/forum/viewtopic.php?f=76&t=33584
http://www.ulthuan.net/forum/viewtopic.php?f=76&t=33584
-
SpellArcher
- Green Istari
- Posts: 13847
- Joined: Sat Sep 13, 2008 11:26 am
- Location: Otherworld
Re: The Cavalry Prince - List Design, Tactics, Battle Reports
Seredain wrote:All I've heard (rumour only), is that this guy doesn't have hell cannons.
Will he bring the 3+ Ward Chosen Block of Doom I wonder? You could try single-bolting the Disc riders but the big guy might have Charmed Shield along.
A New Blog (Orcs and Goblins)
http://ulthuan.net/forum/viewtopic.php?f=5&t=70550
Cavalry Prince Reloaded
http://ulthuan.net/forum/viewtopic.php?f=80&t=70001
http://ulthuan.net/forum/viewtopic.php?f=5&t=70550
Cavalry Prince Reloaded
http://ulthuan.net/forum/viewtopic.php?f=80&t=70001
Re: The Cavalry Prince - List Design, Tactics, Battle Reports
Unfortunately since I'm newly returned to WHFB, and had very little experience with High Elves in the past, I don't feel like I have much to add here. I do definitely want to give some kudos, though - I feel like I've learned more about High Elf tactics reading this thread and the discussion it's prompted than anything else!
-
Curu Olannon
- Vindicated Strategist
- Posts: 4929
- Joined: Thu Sep 30, 2004 6:21 am
- Location: Oslo, Norway
Re: The Cavalry Prince - List Design, Tactics, Battle Reports
Quick question Seredain: why don't you bother upgrading the dispel scroll to a super-scroll (aka Sigil of Asuryan)? I might've overlooked something but I can't seem to recall this being discussed previously. For a measly 20 more points, I would think it's a steal. Consider the damage Dwellers can do to your Hammer and how many times it's potentially cast in a game, or how game-breaking it would be to take away a Vampire Lord's Vanhel's, or Warriors of Chaos Infernal Gateway?
Retired from Warhammer. Playing Warmachine & Hordes (Cygnar).
Follow me on Courage of Caspia, my blog.
Warhammer blogs from 2011-2015:
:: Path to Glory - High Elves Army Blog ::
:: Curu Olannon's Vindicators - 2500 points Army Blog (Old book, outdated) ::
Follow me on Courage of Caspia, my blog.
Warhammer blogs from 2011-2015:
:: Path to Glory - High Elves Army Blog ::
:: Curu Olannon's Vindicators - 2500 points Army Blog (Old book, outdated) ::
Re: The Cavalry Prince - List Design, Tactics, Battle Reports
Thank you, Tgadd, that's very kind.tgadd wrote:Unfortunately since I'm newly returned to WHFB, and had very little experience with High Elves in the past, I don't feel like I have much to add here. I do definitely want to give some kudos, though - I feel like I've learned more about High Elf tactics reading this thread and the discussion it's prompted than anything else!
I don't bother just because there's nowhere comfortable for me to find the 20 points. Sigil of Asuryan is an excellent item, but it'll only do more than the scroll 50% of the time. A scroll tends (through preservation of your dispel dice) to buy you one enemy magic phase: that's a lot for 20 points and you can make it count well enough. Something I like about my magic phase is that it's cheap but is very reliable (with Throne and Lifebloom) and can still get lots done when used properly. I took the scroll in place of the Sigil on the same basis, I guess!Curu Olannon wrote:Quick question Seredain: why don't you bother upgrading the dispel scroll to a super-scroll (aka Sigil of Asuryan)? I might've overlooked something but I can't seem to recall this being discussed previously. For a measly 20 more points, I would think it's a steal. Consider the damage Dwellers can do to your Hammer and how many times it's potentially cast in a game, or how game-breaking it would be to take away a Vampire Lord's Vanhel's, or Warriors of Chaos Infernal Gateway?
Sorry I forgot to get back to you on this before.Curu Olannon wrote:Recently, since I'm playtesting Shadow, I've thought about the possibility of equipping the Prince with Blade of Leaping Gold instead of the Ogre Blade. Now, it's definitely not as reliable... However... 7 S10 ASF hits? Did this ever cross your mind? The way I see it - activating Loec also gives him a chance of cutting down r'n'f (even without magical support) which is umatched by our current setup. Just wanted to check if you ever considered this.
In principle, I don't think it's a good idea to rely on magic to make your prince a good fighting machine. Effectively, you'll have spent 280 points on a character who relies upon another character (in your case a Shadow archmage costing 280 at least), to make him effective in combat by casting Mindrazor. This isn't the best use of your points, I think. Apart from anything else, it forces your Shadow archmage to always be chucking dice at aiding the prince and therefore reduces his flexibility when it comes to picking targets for his spells. As for Loec, that'll buy you one round only: the rest of the time your sword will struggle against anything with T4+ and remotely decent armour. Since I took the prince to reliably kill stuff my other elves can't, this isn't good! So, I'd hold onto the giant blade for the killy prince: no-one's going to dispel that... Apart from High Elves. Lord they're annoying.
I hope so! I'll throw chaff at the bastard while I eat the rest of his army away. Yum yum. Dwellers makes it cry, too.SpellArcher wrote:Will he bring the 3+ Ward Chosen Block of Doom I wonder? You could try single-bolting the Disc riders but the big guy might have Charmed Shield along.
The Cavalry Prince - List Design, Tactics, Battle Reports
http://www.ulthuan.net/forum/viewtopic.php?f=76&t=33584
http://www.ulthuan.net/forum/viewtopic.php?f=76&t=33584
-
SpellArcher
- Green Istari
- Posts: 13847
- Joined: Sat Sep 13, 2008 11:26 am
- Location: Otherworld
Re: The Cavalry Prince - List Design, Tactics, Battle Reports
It's like a red rag to a bull isn't it?Seredain wrote:I hope so! I'll throw chaff at the bastard while I eat the rest of his army away. Yum yum. Dwellers makes it cry, too.
It's a critical build so it'd be very interesting to see whether you can dismantle it.
A New Blog (Orcs and Goblins)
http://ulthuan.net/forum/viewtopic.php?f=5&t=70550
Cavalry Prince Reloaded
http://ulthuan.net/forum/viewtopic.php?f=80&t=70001
http://ulthuan.net/forum/viewtopic.php?f=5&t=70550
Cavalry Prince Reloaded
http://ulthuan.net/forum/viewtopic.php?f=80&t=70001
Re: The Cavalry Prince - List Design, Tactics, Battle Reports
Hello,
quick question, have you faced warmachine heavy armies like dwarves and empire with this list yet?
And how did you fare if you did?
(edit- i have noticed by now a few comments on empire and orcs)
thx
quick question, have you faced warmachine heavy armies like dwarves and empire with this list yet?
And how did you fare if you did?
(edit- i have noticed by now a few comments on empire and orcs)
thx
[color=#00FF40][b]BORKS WAAAGH ON DA WARPATH[/b][/color]
[url]http://z3.invisionfree.com/Orc__Goblin_Warpath/index.php?showtopic=25246[/url]
[url]http://z3.invisionfree.com/Orc__Goblin_Warpath/index.php?showtopic=25246[/url]
Re: The Cavalry Prince - List Design, Tactics, Battle Reports
Hey Seredain, love this thread.
Im new to the game but been doing lots of reading to try to learn while I build my HE Army. The question I have for you is Giant Blade vs Sword of Hoeth? I know you said that you wanted the +3 STR so you can reliably wound very Tough units. Well, for the same point cost would SoH with auto Wounds be better?
Thanks
Re: The Cavalry Prince - List Design, Tactics, Battle Reports
This question has actually cropped up a few times earlier in the thread but, in brief, the Sword of Hoeth doesn't have any armour-penetration value, so it'll be useful against a far smaller selection of troops than the Giant Blade, which hurts tough and heavily armoured units.Draven wrote:The question I have for you is Giant Blade vs Sword of Hoeth? I know you said that you wanted the +3 STR so you can reliably wound very Tough units. Well, for the same point cost would SoH with auto Wounds be better?
BorkBork,
I have! You've found my early comments on shooty Empire and Orcs, but I've also played Dwarfs successfully. This was pre-thread but the principles of deployment I used against them are recorded under the section titled "Against Refused Flanks". Check the List of Contents on page 1 and you'll find it.
Your question is well-timed, however, since my game against Chaos Warriors, for which I showed up on Monday, actually turned out to be a game against a very shooty Empire list (Warriors guy had dropped out and this guy, who runs the club, had temporarily taken his place).
Mini-Report - 2500 High Elves vs 2250 Empire
It wasn't a particularly fair fight, since I was expecting a pumped-up Warriors player who'd accrued plenty of territories since the campaign started: I'd spent about 135 extra gold on top of my usual list. My opponent, however, only had a 2250 Empire list. Partly this was because he felt I'd been ambushed by the change of armies (people are allowed to tailor against their opponent in this campaign- seen as a valuable tool), but also because his models weren't based (the rules on fully painting your armies are strict here!).
Anyway, his list was roughly thus:
Empire General- +2 Str Weapon, Armour of Meteoric Iron, 4+ Ward
BSB- Stuff
Lvl 4 Death Wizard- 4+ Ward, Feedback Scroll
Lvl 2 Light Wizard- Stuff
3 Engineers: Hochland long rifles
38 Halberdiers- Full Command (General + BSB)
10 Detachment Handgunners
10 detachment Handgunners
40 Halberdiers- Full Command
10 Detachment Handgunners
10 detachment Handgunners
3 Mortars (Engineers)
3 Cannons
Not massive, then, but certainly a gunline. I had:
Seredain
Prince - Barded Steed, Dragon Armour, Shield, Giant Blade, Helm of Fortune, Plucker Pendant, Talisman of Loec - 286
Lecalion
Level 4 Archmage - Dispel Scroll, Lore of Life - 280
Caradath
Battle Standard Bearer - Barded Steed, Great Weapon, Heavy Armour, Shield, Dragonhelm, Dawnstone - 175
35 Spearelves - Full Command, Gleaming Pennant - 345
14 Archers - Musician - 159
14 Archers - Musician - 159
14 Swordmasters - Bladelord, Standard, Banner of Sorcery - 284
12 White Lions - Full Command, Banner of Eternal Flame, Gem of Courage - 230
8 Silver Helms - Musician, Shields - 192
5 Dragon Princes - 150
1 Tiranoc Chariot - 85
2 RBTs - 200
2 Eagles - 100
Spells: He rolled Doom and Darkness, Fate of Bjuna, the Signature Spell, something else and, for Light, the signature spell and Net of Amyntok (no idea how to spell that...).
I got Dwellers Below, Regrowth, Flesh to Stone and Throne of Vines.
The Plan
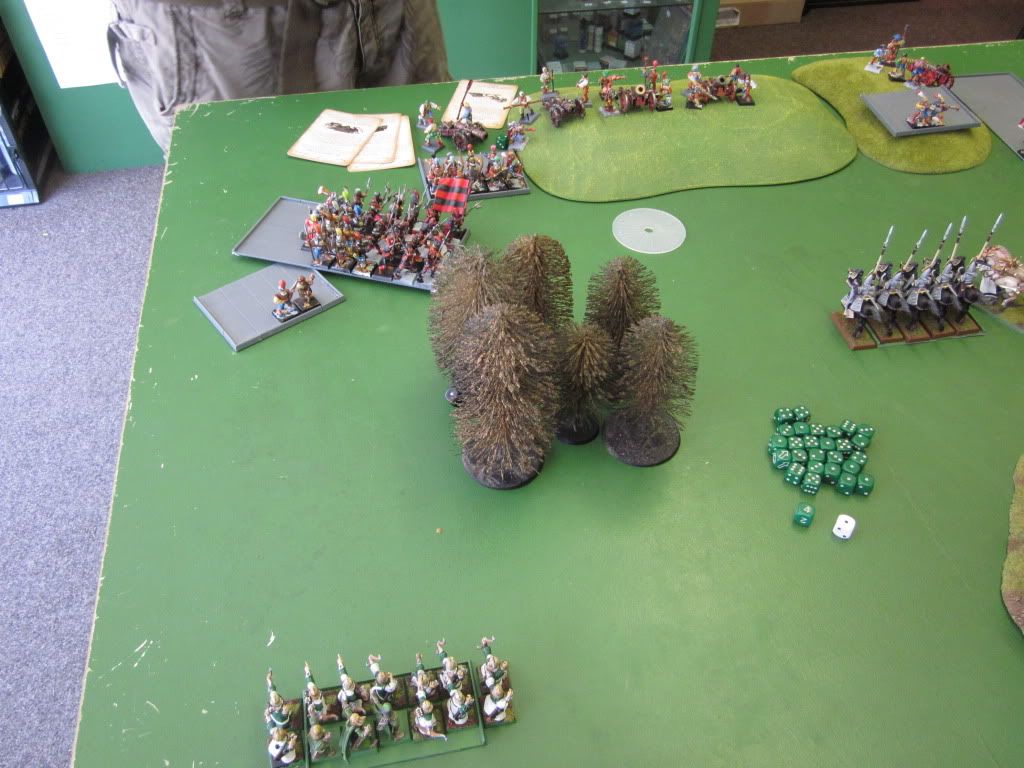
I'll cover what happened only briefly, since it wasn't really a fair fight (and I have a train to catch for a holiday). I will say that deployment was a rather easy phase for me, since the whole Empire army was deployed on the table in very few drops. I was therefore able to plan exactly how to take it out. This is, I suspect, a major weakness in any army which has both big blocks and lots of points invested in war machines which, of course, deploy all at the same time. My opponent got a hill for his machines and put them all up there. I deployed some early fast units in a way which suggested I was planning to rush the guns. To counter this, my opponent shoved his halberdier blocks to either side. I chose the one with the general in it and arrayed all of my main attacking units opposite and outside of it. The other halberd block I'd simply hold up with archers and failed charges until I'd killed the general and overrun into the gunline.
My silver helms were deployed on the far right for 3 reasons:
1- There was a building there, so they couldn't be cannoned on Turn 1.
2- They were further away from the Empire troops but, with their faster movement, they would be threatening charges on the same turn as my infantry. This would make target selection difficult for my opponent.
3- The Empire gunline up on the hill was so long that plenty of them on the far side wouldn't be able to see the knights as they moved up the far flank.
4- When I hit the flank of the Empire, I'd overrun along it rather than off the board.
5- The Death Wizard Lord was on the far flank. My prince would therefore start way out of range of all his spells and, once he got within range, he'd be in combat and therefore immune from the direct damage spells. Nice.
The board looked like this:
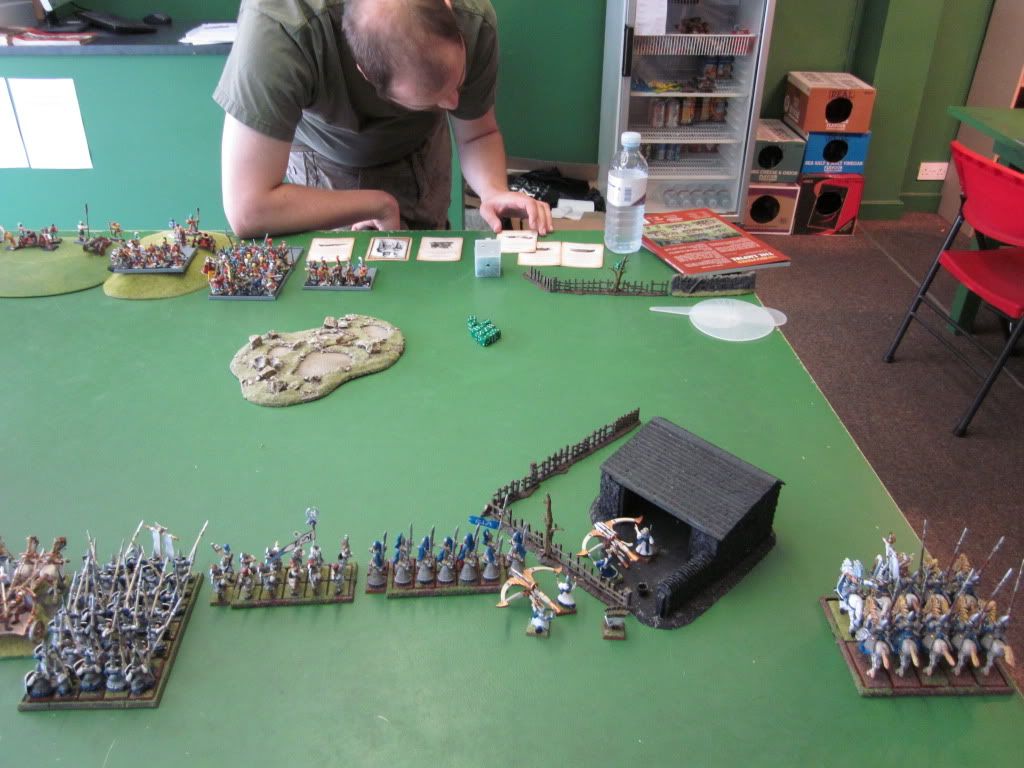
Right Flank
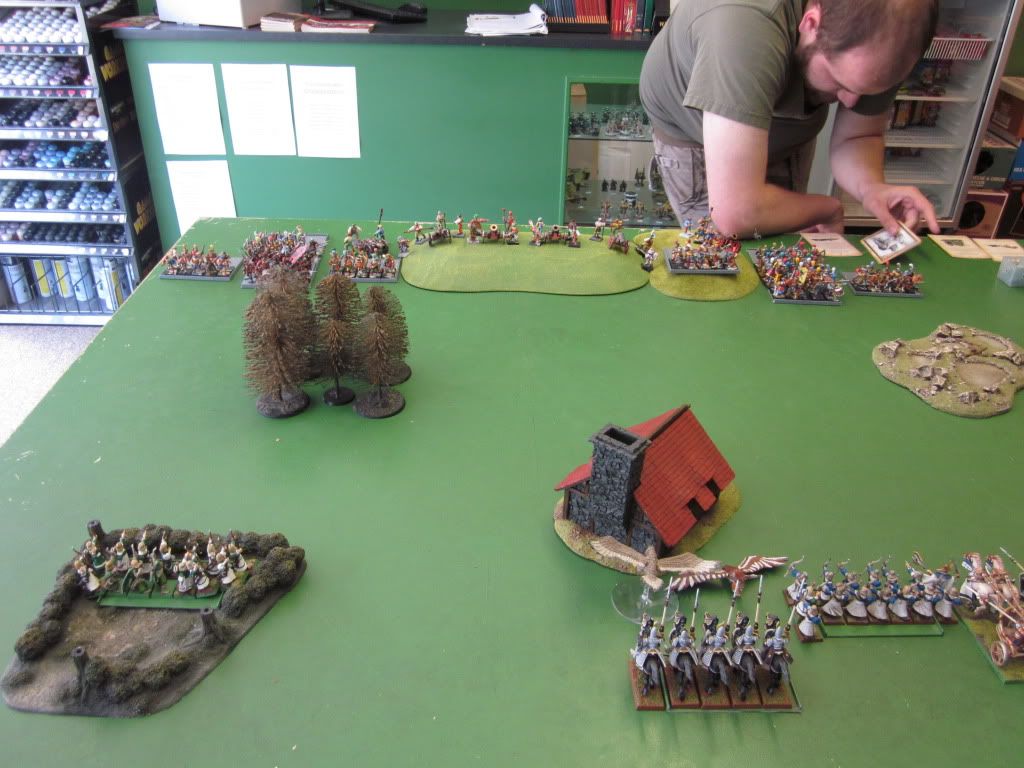
Left Flank
In short, I threw my small fast units in the centre (eagles, chariot, dragon princes) to be shot while my attacking flank moved up to overwhelm the Empire general and his halberds. He shot plenty of them (particularly the spears), but my repeated casts of Dwellers crippled his main unit and, by the time my elites got there, there was actually very little to fight (what was left could have easily handled another 250 points of troops!) It went like this:
End of Turn 2. The Empire machines really struggled to hit the small elite units on Turn 1 (even with the engineers' re-rolls), gave up and started pounding the spears. A few then misfired before two mortars landed super-accurate shells on the head of my general and... I passed by my Look Out Sir! rolls. At this stage I have my units surrounding his general at average charge range (for M5 troops), hoping to encourage a failed charge from him which I can counter-attack. Frankly, my success with Dwellers had made this level of planning unnecessary, but I feel confident that I could have handled plenty more troops with this set-up.
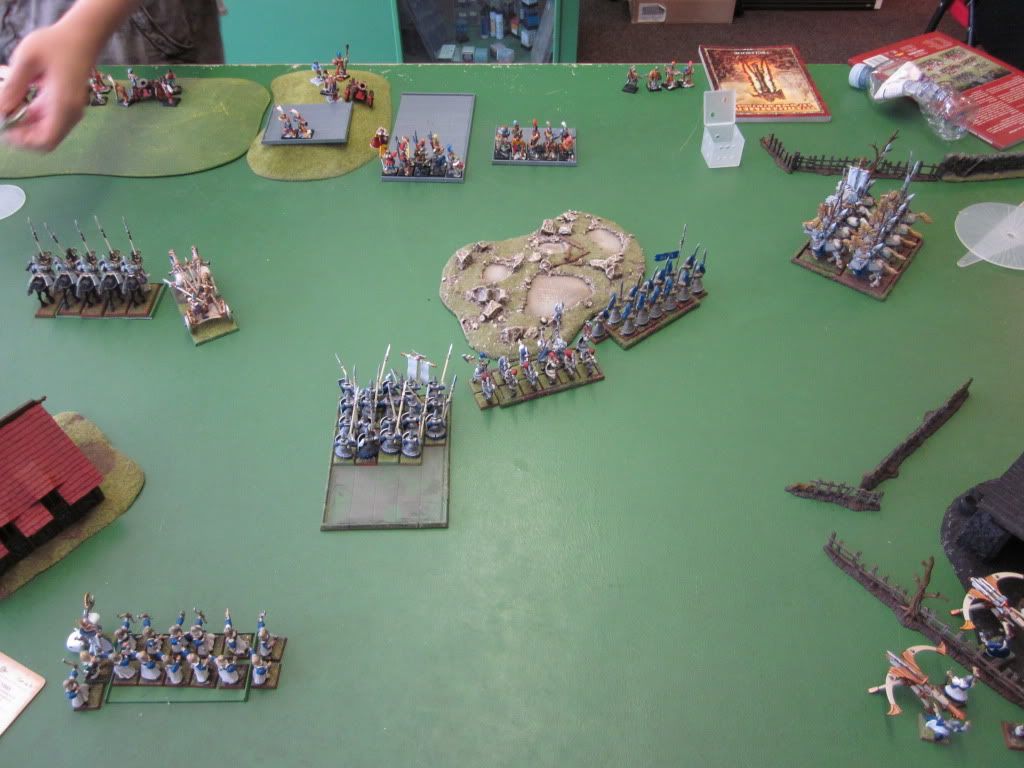
Turn 2 Left Flank: Archers annihilate a detachment of gunners before moving up to threaten the solo Level 4. They and the repeaters bring him down to only 1 wound after two rounds of shooting: his LOS and ward saves were amazing! The middle (blue) archers nailed the Lvl 2 wizard on Turn 1, though. That was ace.
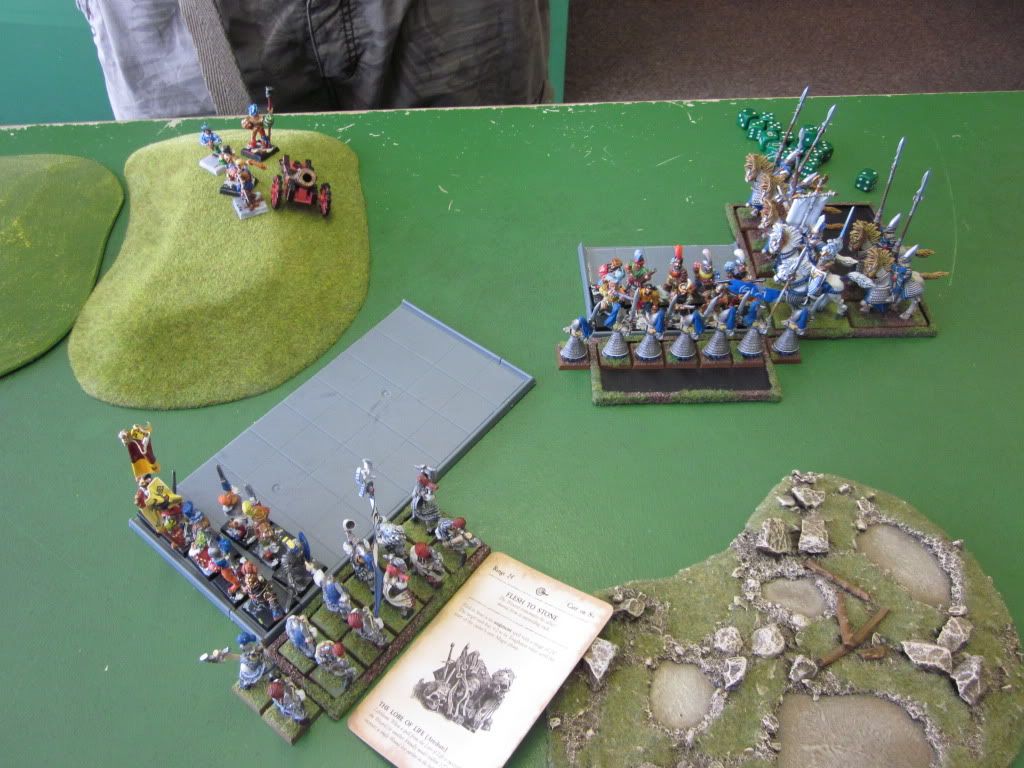
Turn 3 Combat Phase. His general tried (and failed) a charge against my chariot (which fled), allowing my white lions a flank charge. I threw Throne up and then Flesh to Stone on the Lions. His characters could manage no wounds against my T7 elites and the remaining imperial troops were run down with ease. My knights and swords (depleted a little now) begin the overrun of the long back line.
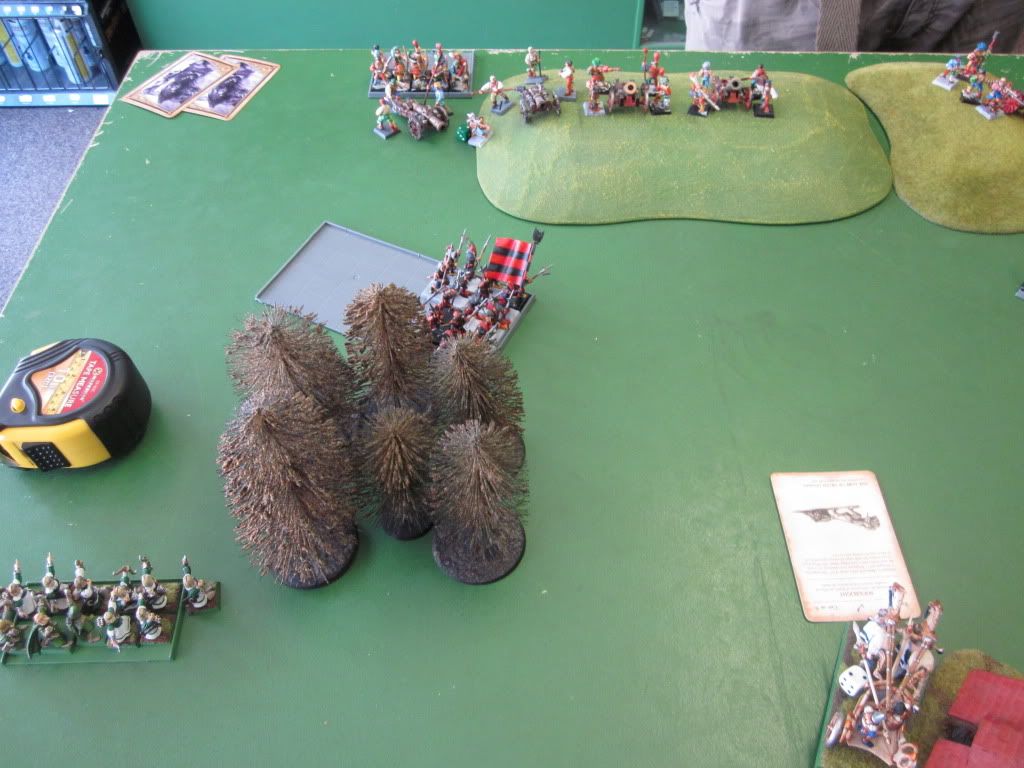
Turn 3 Left Flank: The halberdier block is pulled into a failed charge by the dragon princes (who were threatening a charge on the guns), slowing their advance to support the far flank. By the end of my turn, Dwellers and missile fire had really taken their toll.
Turn 4: As the White Lions carve through the artillery line (they were better placed), my other units surround the last halberdier block. My spears are suffering from shooting at this point.
A combo-charge from my cavalry and swordmasters wipes out all the Empire troops...
...before the knights overrun into the Wizard Lord (who needed to stay close to the halberds or be shot to death) and kill him. Annoyingly, this wasn't before he miscast and blew a whole in both my units. Bastard.
The End Game: Seredain and Caradath charge out of the helms to join the lions in finishing the last cannon and handgunner detachment (which had panicked earlier and rallied behind). The Empire army is tabled.
Lessons Learned
350 points-odd makes a lot of difference! Having said that, I deployed and concentrated my forces well enough to feel safe that I would have crushed the Empire's left flank even if he'd had twice the number of infantry. All my elites made it through at fighting strength and, with Dwellers going off (3 times this battle), the big blocks were in trouble.
Shooting: his list showed the risk of spending that many points on guns that scatter, blow up etc. The engineers especially were a ton of points that, in the end, achieved little. All of my units were damaged by game's end (none of them killed in combat), but none were destroyed. Against high leadership elves, the Empire needed some decent combat units to drive the damaged units off completely and pick up the points. I did lose my eagles, but that wasn't a biggy.
Armour: a decent armour save really helps against mortars. My knights and lions all made it into combat relatively unscathed.
Flesh to Stone: an excellent spell which found its usual perfect role in protection my small elite units- saving the swordmasters from shooting (Turn 1) and the lions from combat (Turn 3). With Dwellers being chucked about, my opponent was unwilling to throw all his dispel dice to stop it, so it proved incredibly useful. Excellent.
The Campaign
Another 5-point win sees me hold this empire, after two mine explosions and one defeat-by-absence.
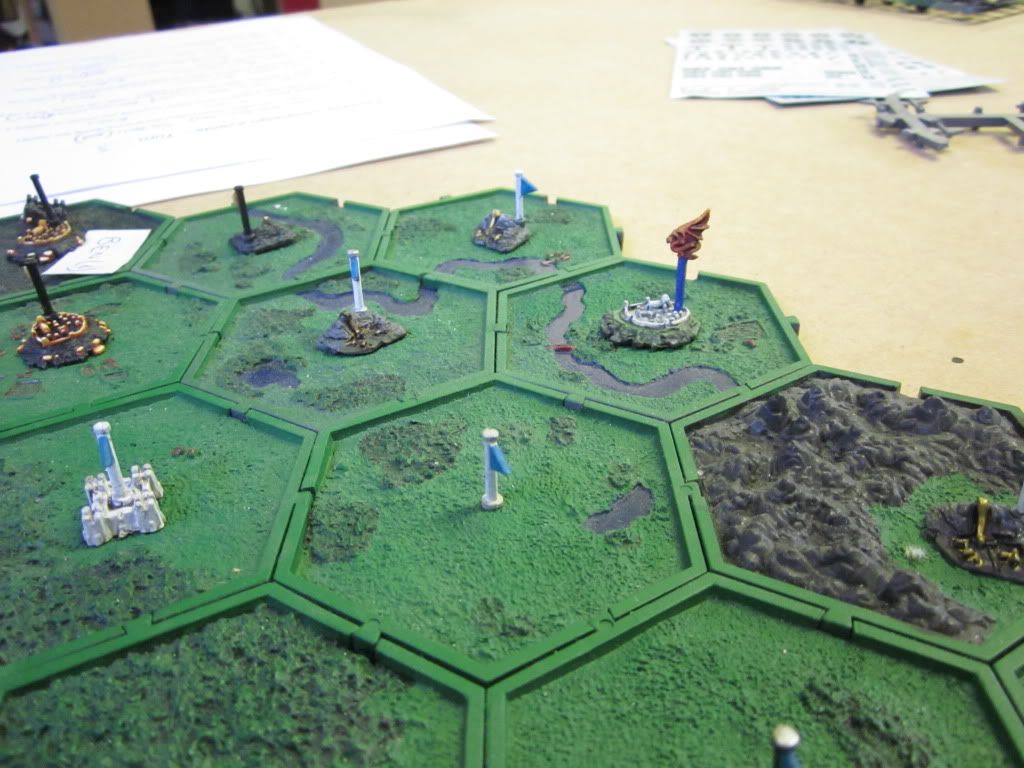
Here you see my two river mines, mountain mine and other territories with blue flags, including a fortress and my capitol. In the distance are some Tomb Kings territories (formerly the Daemons I beat but the guy changed armies).
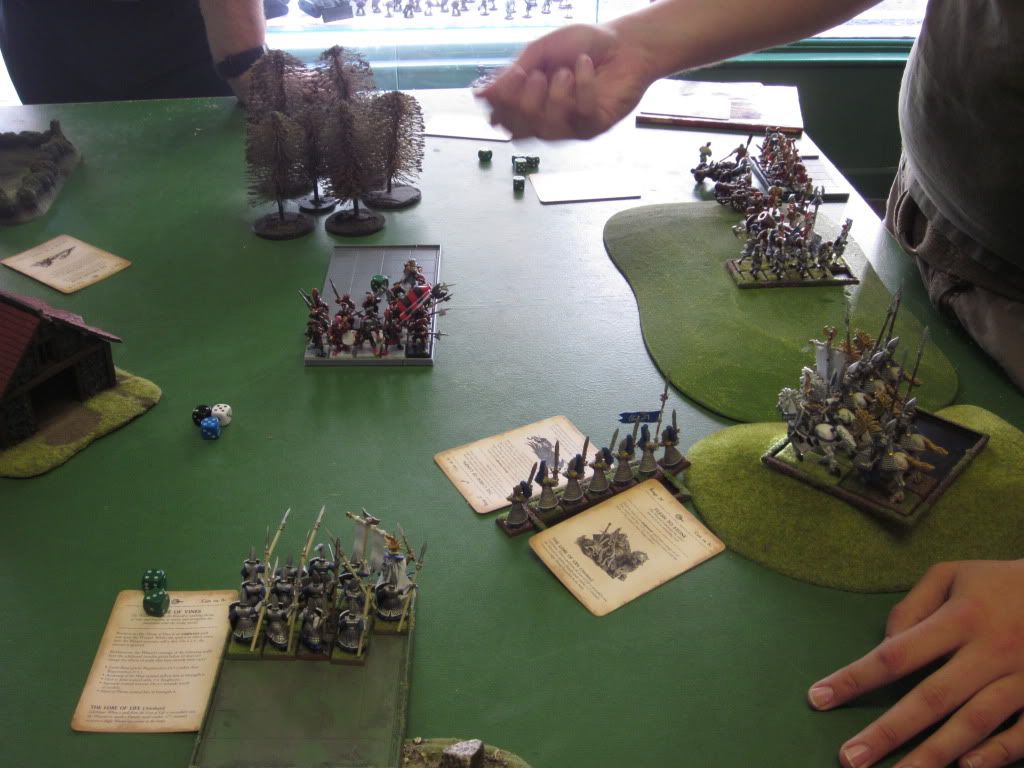
In other news, on a neighbouring table was a big Watchtower struggle going on between Lizardmen and horde Daemons (with Masque, Anti-leadership bomb BSB, 2 Tzeeentch spellcasters and a bus of 8 Juggernauts). The daemons absolutely steamrolled the Lizard blocks in combat before the stegadon managed to stomp a block to death. The stars of the show, however, were the Razordons, who (with magic), cleared out the daemon unit occupying the tower (19 Bloodletters with BSB), and then, amazingly, wiped out all of the 5 remaining juggernauts (of starting unit of
Haha. Silly game.
I took a few pics FYI.
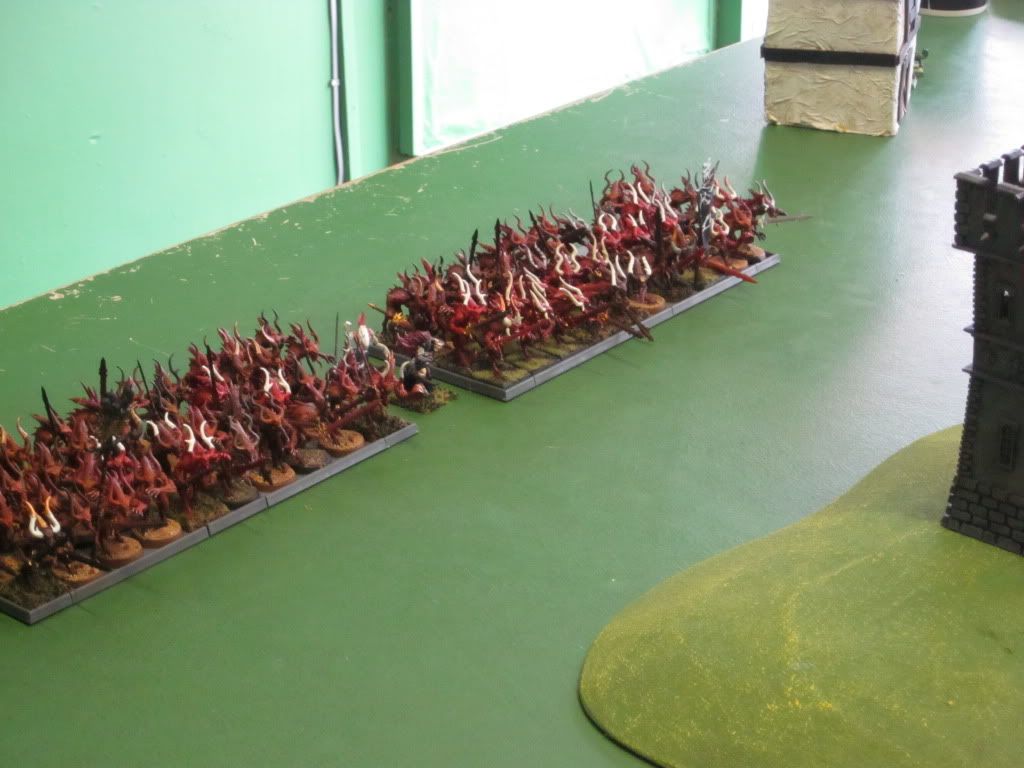
All the bloodletters! 19+ BSB started the game occupying the tower.
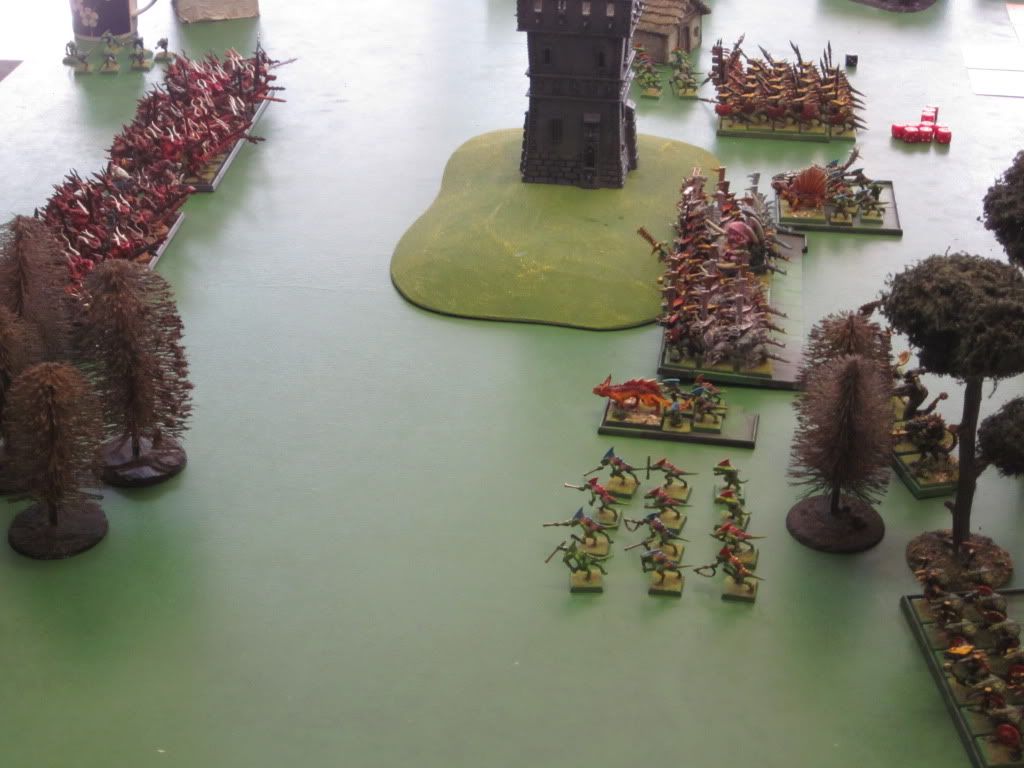
This flank-attack was devastating. The Temple Guard just melted.
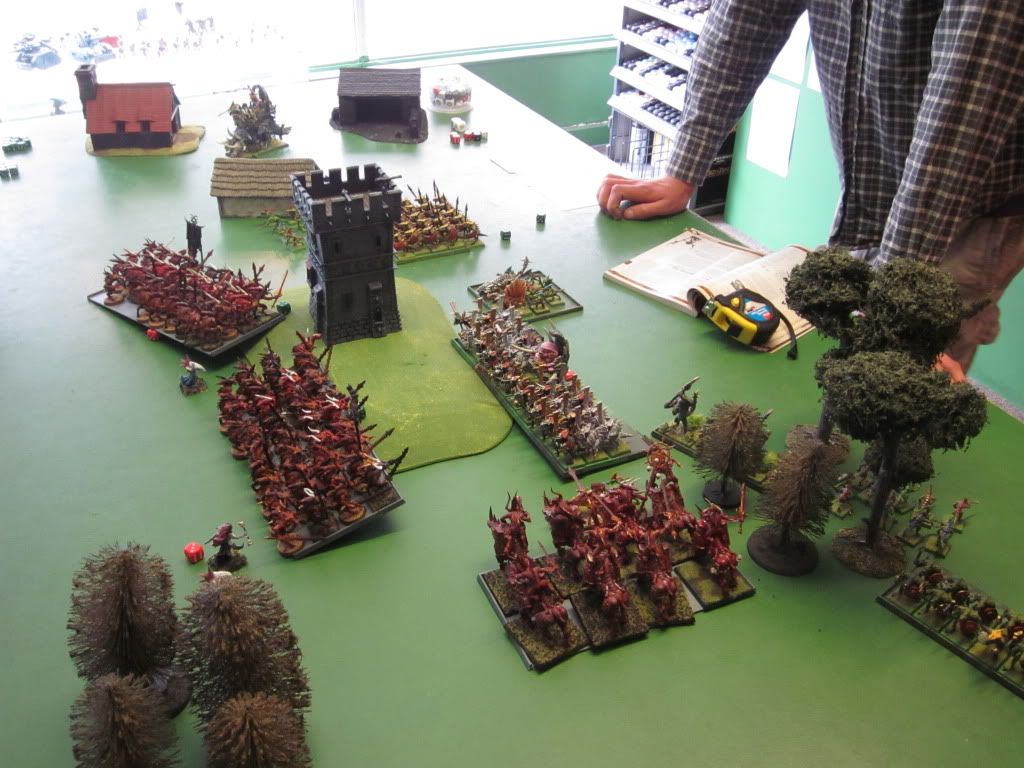
The saurus spears did better but the leadership-bomb in the tower made them run and they were cut down.
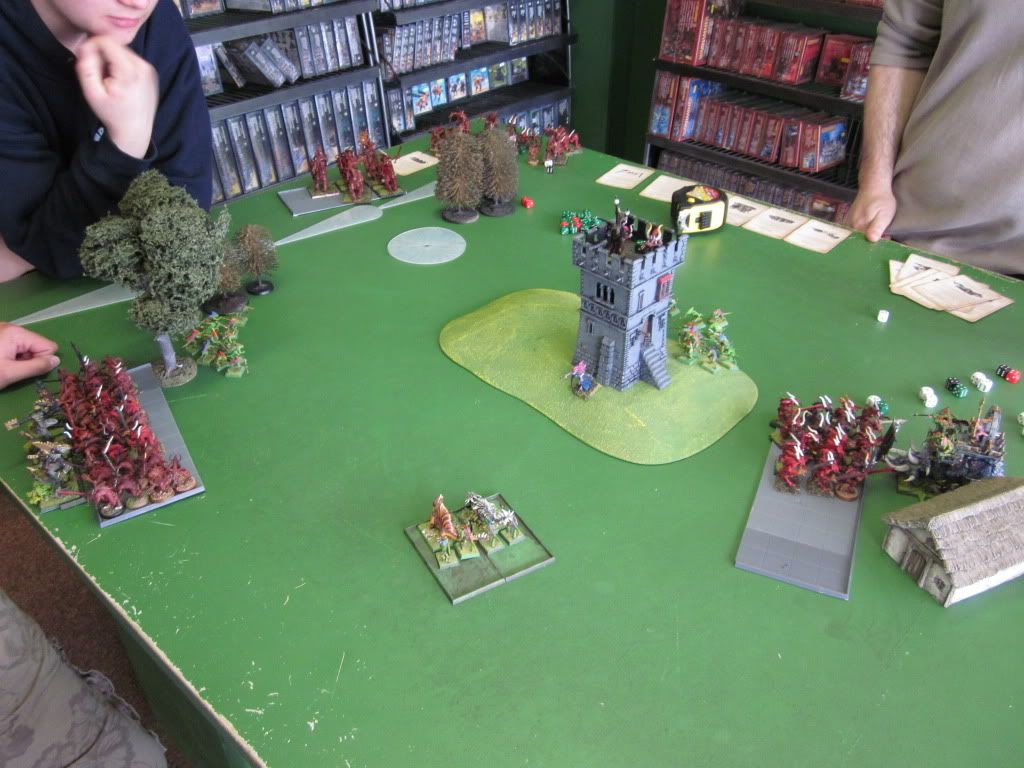
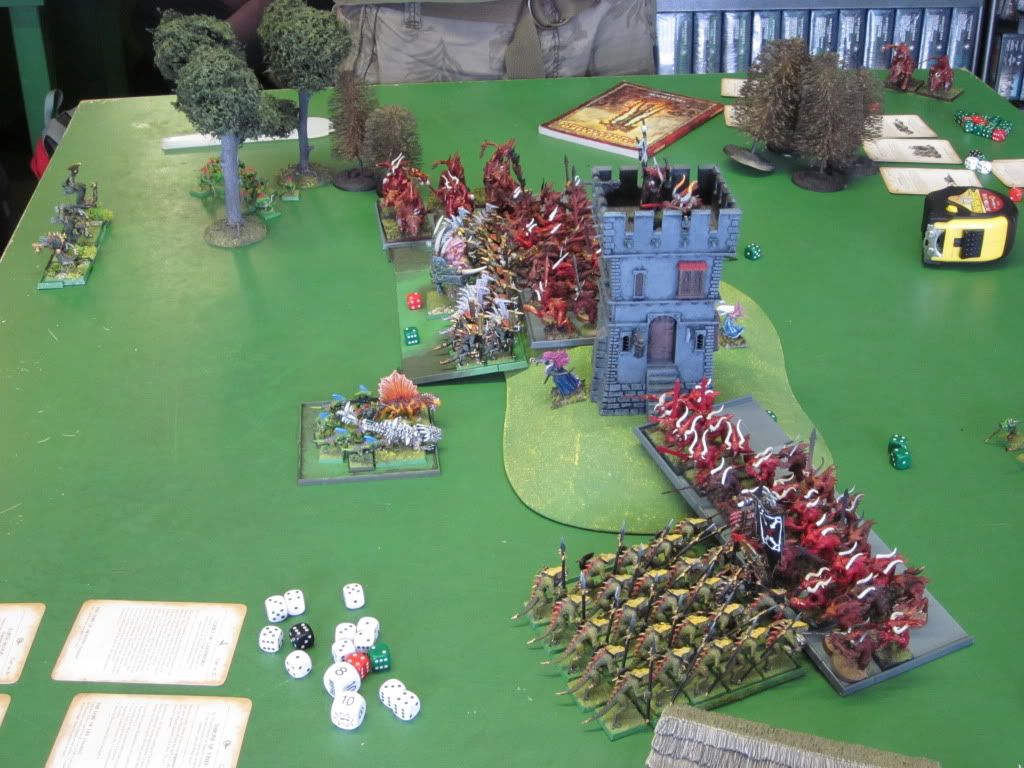
A countering flank-attack from the stegadon managed to grind the daemons down, but he was eventually brought down by Death magic. The Lizards didn't play to hold up the big daemon block well, allowing it to assault the tower, but some skinks took the Tower first on Turn 6 and managed to hold it against overwhelming odds.
So, I'm off on holiday now. Again! If anyone has any questions, please feel free to throw them down here and I'll try and answer them when I'm back in a couple of weeks. In the meantime, peace!
Last edited by Seredain on Tue Sep 20, 2011 10:02 pm, edited 1 time in total.
The Cavalry Prince - List Design, Tactics, Battle Reports
http://www.ulthuan.net/forum/viewtopic.php?f=76&t=33584
http://www.ulthuan.net/forum/viewtopic.php?f=76&t=33584
-
SpellArcher
- Green Istari
- Posts: 13847
- Joined: Sat Sep 13, 2008 11:26 am
- Location: Otherworld
Re: The Cavalry Prince - List Design, Tactics, Battle Reports
Nicely done!
Hopefully this showed him why he needs more than two fighting units. You rolled probably the four best spells too! Your reports always seem to include a pic of some poor enemy mob with at least three of your elite units sticking out of it!
As for that Daemon army...not subtle. Not subtle at all.
Hopefully this showed him why he needs more than two fighting units. You rolled probably the four best spells too! Your reports always seem to include a pic of some poor enemy mob with at least three of your elite units sticking out of it!
As for that Daemon army...not subtle. Not subtle at all.
A New Blog (Orcs and Goblins)
http://ulthuan.net/forum/viewtopic.php?f=5&t=70550
Cavalry Prince Reloaded
http://ulthuan.net/forum/viewtopic.php?f=80&t=70001
http://ulthuan.net/forum/viewtopic.php?f=5&t=70550
Cavalry Prince Reloaded
http://ulthuan.net/forum/viewtopic.php?f=80&t=70001
Re: The Cavalry Prince - List Design, Tactics, Battle Reports
As an eire player, seeing that makes my cry, and also remember why i take a fighting block per 500 pts of army!
Three engineers is a total waste, especially with rifles. Did he ever get any sniper shots off?
Three engineers is a total waste, especially with rifles. Did he ever get any sniper shots off?
an interesting variation on my usual playstyle, which is 'charge forward, forward for the love of khaine, we can fight better than any of them and they can't shoot into melee why is our armor so thin ohgodcannons'
-
Swordmaster of Hoeth
- Southern Sentinel
- Posts: 4480
- Joined: Thu Jul 01, 2004 9:01 am
- Location: On the path of an outcast
Re: The Cavalry Prince - List Design, Tactics, Battle Reports
Hi Seredain!
It really looks so easy to defeat a gunline in your battle report Still a few questions/comments:
1. What about his magic phase? Did you suffer from it at all? Feedback scroll is quite nasty sometimes, did he use it effectively (inflicting some wounds on your Archmage)? You also seem to have important spells to easily go through, how was his magic defence?
2. I wonder about his deployment. He had an artillery on a hill and could easily intercept anything approaching towards it if he moved his combat units forward (and deployed them closer to the hill on each flank). Was that a mistake on his part as you attacked from the right flank decimating his combat unit anyway.
3. I have a feeling his shooting was too chaotic (in terms of target selection). Empire players I faced had a following target priority: cannons - repeaters, characters (even if in units, sometimes people fail their LOS roll); mortars - spears or other infantry. Your units got to his lines almost without casualties (spears excluded). 3 cannons and 3 mortars is a very dangerous artillery combination even without enineers. I am really surprised he didn't inflict crippling damage on your units. It also looks like you had a first turn, which is always very handy against gunlines and I never had luck to get when I really need it
It really looks so easy to defeat a gunline in your battle report
1. What about his magic phase? Did you suffer from it at all? Feedback scroll is quite nasty sometimes, did he use it effectively (inflicting some wounds on your Archmage)? You also seem to have important spells to easily go through, how was his magic defence?
2. I wonder about his deployment. He had an artillery on a hill and could easily intercept anything approaching towards it if he moved his combat units forward (and deployed them closer to the hill on each flank). Was that a mistake on his part as you attacked from the right flank decimating his combat unit anyway.
3. I have a feeling his shooting was too chaotic (in terms of target selection). Empire players I faced had a following target priority: cannons - repeaters, characters (even if in units, sometimes people fail their LOS roll); mortars - spears or other infantry. Your units got to his lines almost without casualties (spears excluded). 3 cannons and 3 mortars is a very dangerous artillery combination even without enineers. I am really surprised he didn't inflict crippling damage on your units. It also looks like you had a first turn, which is always very handy against gunlines and I never had luck to get when I really need it
Twitter @SwordOfHoeth
High Elves MSU - Observations
Rabidnid wrote:Are you seriously asking someone called Swordmaster of Hoeth why he has more swordmasters than white lions? Really?
Re: The Cavalry Prince - List Design, Tactics, Battle Reports
Not at all subtle. A nasty trick, that army, with its killer units and leadership bomb, but not a keeper I think. Firstly, all his casters were running around by themselves. Even with ward saves, that's not a good plan. Secondly, the leadership bomb only really works if the daemons win combats to force break tests. Since that whole army only has 4 units, you should flank those mothers and win the combats instead!SpellArcher wrote:Nicely done!
Hopefully this showed him why he needs more than two fighting units. You rolled probably the four best spells too! Your reports always seem to include a pic of some poor enemy mob with at least three of your elite units sticking out of it!
As for that Daemon army...not subtle. Not subtle at all.
As for the surround, that's the whole point of the knights! I mean what else are you meant to do with M8?
Empire player is getting his units based and looking to include greatswords and flagellants. A good move I reckon.
Csjarrat,
I agree about the engineers- way too many points spent, especially given the expense of all the machines themselves. They were tricky, however. My archmage miscast on Turn 3 (despite having Throne up), at the same time as being hit by the feedback scroll for 1 wound. One sniper got a shot off at him next turn and... missed. Aha.
Swordmaster,
1. His magic went pretty well with the Wizard Lord. He got Doom and Darkness off a few times, hoping to force panic tests. Net of Amyntok went off on the swords on Turn 1 (he got first turn), but they passed their test to move so it didn't work. I then shot his Lvl 2, so no more net.
2. Honestly, his infantry didn't have a chance with my magic and elites pounding and surrounding them. Not a good test game in this respect, though, since I had more points. Deployment was way in my favour since he had so few drops. He could've put his blocks anywhere and I still would've outmanoeuvred them.
3. The gunline itself really was the stuff of larger armies, however! 6 artillary pieces, 3 engineers and 40 handgunners was quite intimidating. He was actually quite systematic with his targeting. First he tried to crush my elites, but was thwarted by their small size. Even with the re-rolls, the scattering mortars couldn't really hit them! Lion cloaks and Flesh to Stone also helped immensely. Then he targetted my knights, but no cigar: AS 2+ is good against mortars, while my prince passed both LOS saves. As for the cannons, one misfired and the others struggled to get line of sight on my prince, since their fellow guns and handgunners all along the long line kept being in the way. They knocked out 4 helms I think and some swordmasters, but nothing I couldn't take. In the end, most of the machines gave up and started smashing up the spears, with great success since they were a large and fragile target.
A final note: remember that I was bearing down on the war machines with eagles, dragon princes and the chariot, while I'd timed my advance so that all my combat units got within charge range at the same time. With the repeaters to think about as well, target selection was difficult for my opponent.
Thanks for the good questions chaps! I'll have no internet access for a couple of weeks as of tomorrow, unfortunately, so, until my return, fare thee well!
The Cavalry Prince - List Design, Tactics, Battle Reports
http://www.ulthuan.net/forum/viewtopic.php?f=76&t=33584
http://www.ulthuan.net/forum/viewtopic.php?f=76&t=33584
Re: The Cavalry Prince - List Design, Tactics, Battle Reports
Thx for your reply and bat rep seredain.
That empire player also focussed too much on the hill, while the fence and wall on his left would probably have been more usefull against your army. And you really dont need a hill if you dont put anything in front of your canons in the first place.
although it was not really a proper test it is sure good to see your list can tackle a gunline.
3 cannons and 3 mortars usually get me in a horrible mood.
btw: what do you think about a list (rather) similar to yours with 1 rbt swapped for 5 reavers?
[color=#00FF40][b]BORKS WAAAGH ON DA WARPATH[/b][/color]
[url]http://z3.invisionfree.com/Orc__Goblin_Warpath/index.php?showtopic=25246[/url]
[url]http://z3.invisionfree.com/Orc__Goblin_Warpath/index.php?showtopic=25246[/url]
-
Mentheus of Caledor
- Posts: 394
- Joined: Tue Apr 19, 2011 9:56 am
Re: The Cavalry Prince - List Design, Tactics, Battle Reports
Hi again Seredain,
Loving this thread. Especially the batreps.
Just wanted to inform you (i thought you might be interested), I played a game last night against dark elves. I usually have TERRIBLE luck in a game, and I don't know what the problem is. So, in an effort to circumvent my own apparent inability at list making i used your list (with only a minor change). I kept everything the same, but i just can't stand having my AM quite so naked as yours.
Especially since shadowblade tends to eat him.... Anyway. For this reason I swapped the eagle (at much discontent) for Folariath's robes. The game went amazingly. In my favour at least. I would write up a battle report but I've never done so and since this is my examination period, now is not the moment to devote a large portion of my time to something other than study. Just wanted to let you know I think the list is totally awesome. The prince hacked his way through a hydra (with a little help from the bsb +helms) since my lions failed their charge (doh! So much for a combo charge....). The prince is a beast. Love him =) I do have to say however, as i think i stated earlier, that as much help as the bsb is in the helms, I find that his presence is sorely missed with the spearelves. So i think more alterations are in need for me, at least. But, great list. I'm amazed at how well it plays. I commend your list making brilliance and heartily recommend this list to anyone having "bad luck" with their own lists. =)
"They thought we had all but died out, but as we take to the skies our foes will tremble with fear, for they will know the True Dragon Princes have returned."
-
akielzather
- Posts: 293
- Joined: Wed Dec 29, 2010 1:03 am
- Location: Scotland
Re: The Cavalry Prince - List Design, Tactics, Battle Reports
Post was on page two!!
could not have that.
Any news on recent battles?
could not have that.
Any news on recent battles?
8th 2012 Tournie P12 W8 D0 L4
8th 2013 Tournie 7th Ed book P17 W9 D2 L6
Totals P29 W17 D2 L10
Characters.
Calidiane - Captian of the Silver Helms of Saphery. Death Knight of Hoeth.
Maulinerine - Archmage of Life.
Kavineer - Battle-standard Bearer
8th 2013 Tournie 7th Ed book P17 W9 D2 L6
Totals P29 W17 D2 L10
Characters.
Calidiane - Captian of the Silver Helms of Saphery. Death Knight of Hoeth.
Maulinerine - Archmage of Life.
Kavineer - Battle-standard Bearer
-
TheIdleVagrant
- Posts: 4
- Joined: Thu May 26, 2011 6:54 pm
- Location: London UK
Re: The Cavalry Prince - List Design, Tactics, Battle Reports
Yes, please - craving updates...must have updates...been....too..looong.... 
At least I'm housebroken...
Re: The Cavalry Prince - List Design, Tactics, Battle Reports
Ahoy shipmates!
I do have news on recent battles, or one at least. My lengthy absence of late as been entirely down to the weather, which had me trapped on a boat in harbour at the Scilly Isles. I have discovered that boats are, pretty much, like caravans only you are always wet and always moving.
Anyway, the moment I made landfall I had to head homewards for my next campaign game, this time against Vampires.
High Elves vs Vampire Counts
There was some good news and some bad news. The good news was that I had 90ish gold saved up from the last round. The bad news was that my 3 mines were all useless this round, since someone had chosen the 'Fool's Gold' event for me and prevented me from collecting any more gold at all, meaning my opponent was able to spend about 200 points more than me on his list. The vampires' host was as follows:
Mannfred von Carstein- Usual Stuff, 2 extra wounds, +1 to cast and dispel, Vamp Lore, Death Magic (all spells of both)
Thrall 1- Helm of Commandment, Stuff, Vamp Lore
Thrall 2- Stuff, Vamp Lore
Wight King BSB- Regeneration Banner
Wight King- ASF, Killing Blow
40 Grave Guard- Full Command, Great Weapons, Heavy Armour (Mannfred and both Wights here)
40 Ghouls- Ghast
40 Ghouls- Ghast
27 Skeletons- Full Command (Thrall 2 here)
I had my usual list (see the '2nd List' in the Thread Contents post on Page 1), plus the Banner of Sorcery on the Swordmasters and 2 archers to make up the core points.
Battle Report coming soon...
Last edited by Seredain on Tue Sep 20, 2011 10:04 pm, edited 3 times in total.
The Cavalry Prince - List Design, Tactics, Battle Reports
http://www.ulthuan.net/forum/viewtopic.php?f=76&t=33584
http://www.ulthuan.net/forum/viewtopic.php?f=76&t=33584
-
SpellArcher
- Green Istari
- Posts: 13847
- Joined: Sat Sep 13, 2008 11:26 am
- Location: Otherworld
Re: The Cavalry Prince - List Design, Tactics, Battle Reports
What is this? A unit that doesn't begin with 'g'?Seredain wrote:37 Skeletons
What a jolly list! Who said the hard builds for VC in 8th weren't boring eh? Though he's too many characters I think and where's the Black Coach?
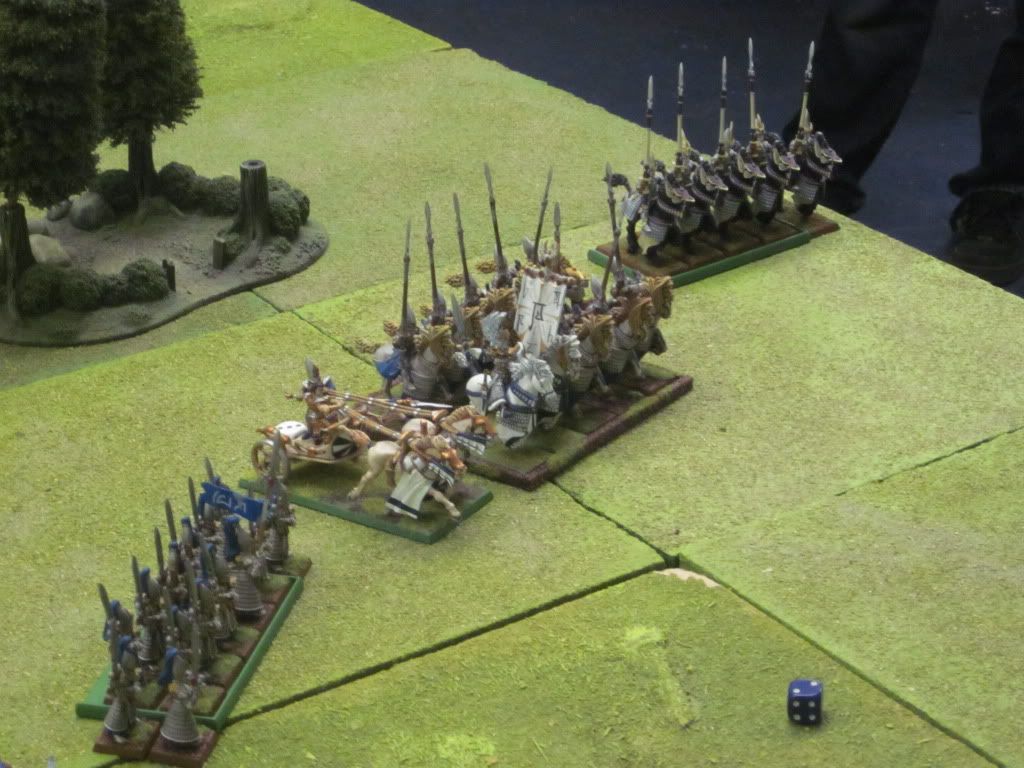
I see your Helms have acquired a shiny new movement tray!
A New Blog (Orcs and Goblins)
http://ulthuan.net/forum/viewtopic.php?f=5&t=70550
Cavalry Prince Reloaded
http://ulthuan.net/forum/viewtopic.php?f=80&t=70001
http://ulthuan.net/forum/viewtopic.php?f=5&t=70550
Cavalry Prince Reloaded
http://ulthuan.net/forum/viewtopic.php?f=80&t=70001
Re: The Cavalry Prince - List Design, Tactics, Battle Reports
Jolly indeed! Ah, but a typo on my part: it's actually 27 skeletons, deployed in horde formation (I'll edit it).SpellArcher wrote:What is this? A unit that doesn't begin with 'g'?Seredain wrote:37 Skeletons
What a jolly list! Who said the hard builds for VC in 8th weren't boring eh? Though he's too many characters I think and where's the Black Coach?
Without giving anything away at this stage, it's safe to say that the vampires' aim was to use Mannfred and the Thralls to just 'raise horde' until the skelly unit was massive. The wight kings go with Mannfred in the GG horde to deathstar it up a notch, of course. No coach was a surprise to me too!
The Cavalry Prince - List Design, Tactics, Battle Reports
http://www.ulthuan.net/forum/viewtopic.php?f=76&t=33584
http://www.ulthuan.net/forum/viewtopic.php?f=76&t=33584
-
Lord Anathir
- Posts: 3416
- Joined: Wed Jun 09, 2004 2:11 am
- Location: Univeristy of Glasgow
Re: The Cavalry Prince - List Design, Tactics, Battle Reports
thats a mean vamp list. if he had some support like a varghulf instead of those skeletons he'd be rocking.
For the dwarfs, there was only this. Hammerson met Grombrindal’s gaze, and the White Dwarf nodded slowly. If it must be done, let it be done well. Whether they were dead or alive, that was the only way dwarfs knew how to do anything.
And Grombrindal said "10 from the back, yeah?"
And Grombrindal said "10 from the back, yeah?"